

The fastest way to hide countertop appliances is to match the solution to how often you actually use each machine. An appliance garage (a cabinet with a tambour, lift-up, or pocket door) suits daily-use gear like coffee makers and toasters. Roll-out trays and lift shelves work for anything you grab a few times a week. Freestanding hutches and pantry tuck-aways handle occasional or seasonal appliances best. Before you buy anything, check two things: whether the cabinet has room for a dedicated outlet, and whether you have enough side clearance for the appliance to slide in and out.
Quick starting point by frequency:
- Daily use (coffee maker, toaster): appliance garage or open shelf with a roll-out tray
- Weekly use (blender, stand mixer): lift shelf in a base cabinet, positioned near an outlet
- Occasional or seasonal (ice cream maker, waffle iron, slow cooker): pantry, hutch, or top-shelf storage
Key Takeaways
Matching each appliance’s hiding method to how often you use it, while solving power and clearance first, is what makes concealed storage actually work long term.
| Point | Details |
|---|---|
| Match method to frequency | Daily appliances need a garage or open shelf; occasional ones belong in a pantry or lower cabinet. |
| Measure before buying | Interior depth of 16 to 18 inches and 3 to 4 inches of side clearance fit most small appliances. |
| Wire power correctly | Install a dedicated internal outlet instead of a standard power strip inside a closed cabinet. |
| Give mixers extra room | Stand mixers need 17 to 20 inches of clearance, often better solved with a base-cabinet lift shelf. |
| Choose curated, compact models | Kitchen Devotion’s appliance priority list helps match appliances to storage-friendly footprints. |
Table of Contents
- How to Hide Countertop Appliances With an Appliance Garage
- Retrofitting an Appliance Garage Without a Full Remodel
- Freestanding and Pantry Options for Renters and Tight Budgets
- Power, Ventilation, and Safety Rules for Enclosed Appliances
- Deciding What to Hide: A Simple Usage Audit
- Kitchen Devotion’s Take on Placement and Product Choices
- Keeping Hidden Appliance Spaces Clean Over Time
- Why Workflow Should Beat Design Every Time
- Curated Appliances That Make Hiding Them Easier
- Sources
- FAQ
How to Hide Countertop Appliances With an Appliance Garage
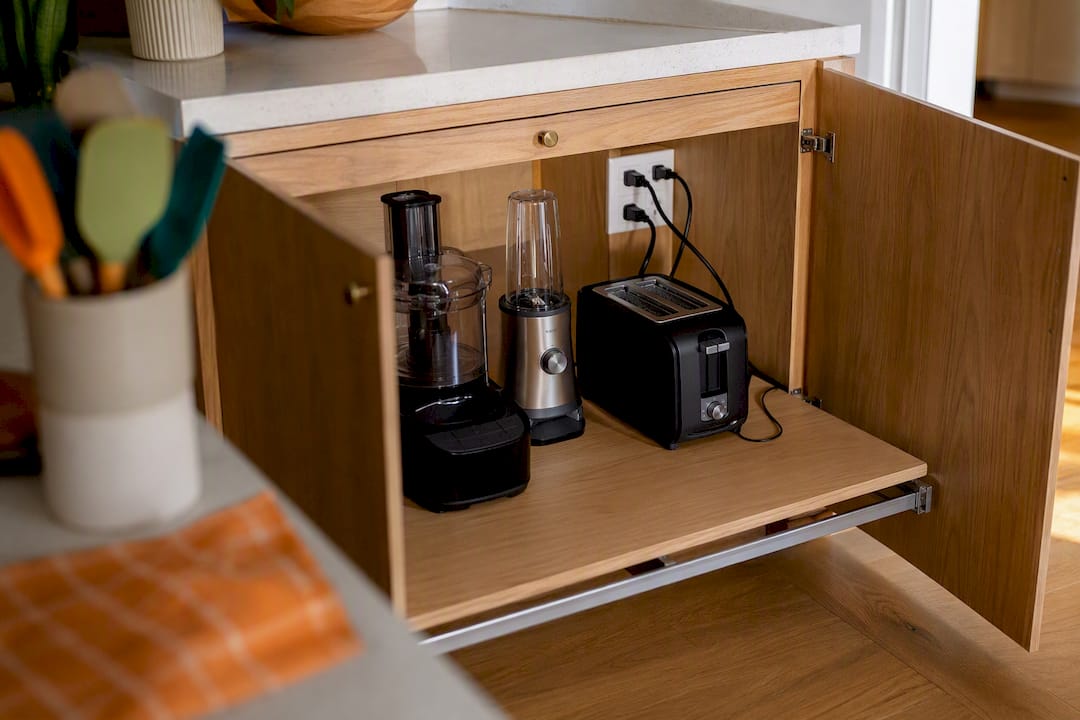
An appliance garage is a cabinet built into your counter run, usually tucked into a corner, with a door that opens to reveal a small appliance station instead of a shelf. Designers have leaned on this feature for years because it solves a specific problem: you want the coffee maker or toaster within arm’s reach, but you don’t want it visible when guests walk in. Designers frequently recommend appliance garages for exactly this reason, especially at dedicated coffee stations.
Three door styles dominate the category, and each comes with tradeoffs.
- Tambour (roll-up) doors slide up and back into the cabinet on a track, similar to a rolltop desk. They look clean and disappear completely when open, but the hardware is more complex, and tambour mechanisms tend to need more upkeep than simpler lift-up doors.
- Lift-up doors swing upward on a hinge and stay open with a gas strut, similar to a cabinet above a refrigerator. They’re simpler, more durable, and easier to repair if something breaks.
- Pocket doors slide sideways into a cavity built into the cabinet wall. They need more depth to install but offer full concealment without any upward swing, which matters under low upper cabinets.
The best use case remains a coffee bar: coffee maker, grinder, mugs, and filters all live behind one door, with the countertop below staying clear for pouring and cleanup. A toaster or blender garage works too, but if you use an appliance for every single meal, a garage door you have to open and close each time can become a hassle rather than a convenience. Higher-end builds now add interior lighting, slide-out platforms, and micro-ventilation for steam, which matters if you’re storing anything that produces heat or moisture.
Pro Tip: Install the internal outlet on the side wall of the garage, not the back, so cords don’t get pinched when the appliance slides forward on its tray.
Retrofitting an Appliance Garage Without a Full Remodel
You don’t need a kitchen renovation to add this kind of hidden storage. Retrofitting is often achievable by swapping one upper cabinet for a full-height unit and running a new outlet, which is a far smaller project than replacing cabinetry throughout the kitchen.
Before you buy a kit, check these four things:
- Cabinet depth: most small appliances need 16 to 18 inches of interior depth to fit fully behind a closed door.
- Interior height: measure your tallest appliance with its lid or hopper open, then add clearance for lifting it in and out.
- Outlet access: confirm whether an outlet already exists inside the cabinet or nearby, since running new wiring changes the scope of the project.
- Door swing or slide path: make sure nothing (a range hood, an upper shelf) blocks the door mechanism you’re considering.
If you need a new internal outlet or any ventilation work, bring in an electrician rather than routing an extension cord through a cabinet wall. Low-effort fixes like drop-in lift shelves or roll-out platforms run cheap and install in an afternoon; a full tambour retrofit with a matched finish and new wiring is a bigger job, both in cost and time.
Freestanding and Pantry Options for Renters and Tight Budgets
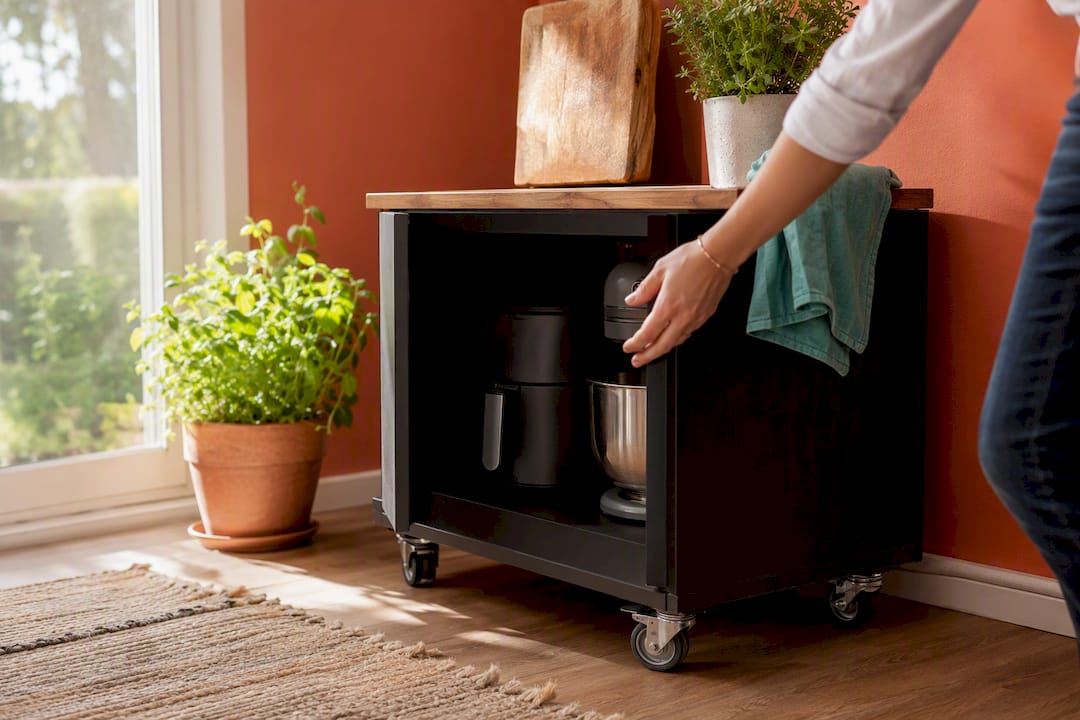
Not every kitchen can support built-in cabinetry, and that’s fine. A hutch or sideboard placed against a free wall does the same concealment job as an appliance garage, minus any construction. Rolling carts give you the flexibility to wheel an air fryer or stand mixer out only when you need it, then push it back against a wall.
For anyone with the square footage, a walk-in pantry or a “secret pantry” behind a door that looks like a regular cabinet front is one of the strongest options available. Designers increasingly use working pantries to centralize small appliances and messy prep tasks in one room, keeping the main kitchen photo-ready at all times.
Freestanding solutions win in a few clear situations:
- You’re renting and can’t modify cabinetry.
- Your budget doesn’t stretch to a built-in retrofit this year.
- You want the option to rearrange or relocate storage later.
Power, Ventilation, and Safety Rules for Enclosed Appliances
Get the electrical side wrong, and a good-looking appliance garage turns into a real hazard. The single biggest mistake homeowners make is running a standard power strip inside a closed cabinet instead of installing a dedicated outlet. Power management is a recurring failure point in DIY appliance storage, and professionals consistently point to the same fix: wire in an outlet built for the space, not a strip meant for open-air use.
A few rules to follow before you close that door for good:
- Install a dedicated internal outlet rated for kitchen use, positioned so cords reach without stretching.
- Add small vents or gaps for anything that produces steam or heat, like a coffee maker or toaster oven, so moisture doesn’t build up inside a sealed box.
- Leave landing space in front of the appliance, not just inside the cabinet, so you have somewhere to set it down while it’s running.
- Coil cords loosely rather than wrapping them tight around the appliance body, which stresses the wire over time.
Fire and hazard risk is a real concern here. Enclosed power strips can overheat in tight, low-airflow cabinets, which is exactly the environment an appliance garage creates by design. Plan the electrical work first, then pick the door style.
Deciding What to Hide: A Simple Usage Audit
Start with a usage audit. Walk your counter and sort every appliance into three buckets: daily, weekly, and occasional. Designers recommend reserving the most accessible storage for daily-use machines and pushing anything seasonal, like a waffle iron or ice cream maker, down into base drawers or a pantry shelf.
- Sort by frequency. Daily items get the appliance garage or open shelf; weekly items get a lift shelf; occasional items go to lower or less-prime storage.
- Measure before you commit. Interior cabinet depth should run 16 to 18 inches for most small appliances; standard counter depth is 24 inches. Leave 3 to 4 inches of clearance on the sides and back for sliding an appliance in and out.
- Check mixer height separately. Stand mixers with the head tilted up often need 17 to 20 inches of clearance, which is taller than most upper cabinets allow, so a base-cabinet lift shelf usually fits better than an upper garage.
- Confirm outlet placement against your final measurements before ordering hardware.
For a deeper look at sorting what stays out versus what gets stored, Kitchen Devotion’s guide to keeping small appliances organized walks through the same audit in more detail.
Kitchen Devotion’s Take on Placement and Product Choices
K. Connors, writing for Kitchen Devotion, has covered kitchen organization long enough to know the plan usually falls apart at the measuring tape, not the design phase. Two setups translate the guidance above cleanly into real kitchens:
- A coffee station garage with an internal outlet and a narrow shelf for filters and mugs, built around tips for storing coffee gear without losing prep space.
- A stand mixer on a lift shelf inside a lower cabinet, avoiding the tight upper-cabinet clearance problem entirely.
For appliance-specific placement advice, check Kitchen Devotion’s countertop placement tips for cleaner work zones before finalizing cabinet orders.
Keeping Hidden Appliance Spaces Clean Over Time
A concealed appliance still needs the same cleaning schedule as one sitting out in the open. The difference is that dirt and grease hide better behind a closed door, so problems tend to go unnoticed longer.
Wipe down the interior shelf or tray monthly, even if the appliance looks clean, since crumbs and spilled grounds collect in corners you won’t see unless you pull the appliance forward. Coffee makers and toasters leave the most residue, since both produce steam or crumbs that settle on nearby surfaces. If your garage includes ventilation slots, check them every few months for dust buildup, which can restrict airflow and defeat the purpose of the vent in the first place.
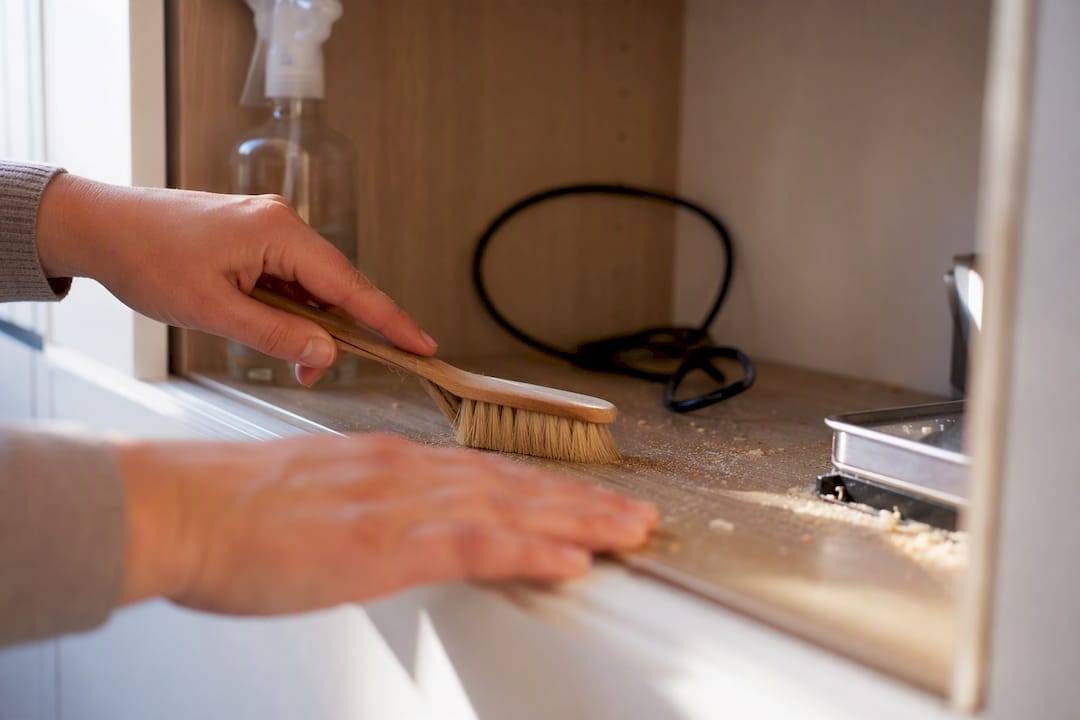
Cords deserve their own attention. Loose coils gather grease faster than you’d expect, so unplug and wipe the cord down whenever you clean the appliance itself. Tambour doors need track cleaning more than lift-up doors, since debris in the roll-up channel can jam the mechanism. A quick vacuum with a narrow attachment, done every couple of months, prevents most of that.
Finally, check the internal outlet and any surrounding trim for discoloration or heat marks. That’s an early sign of an overloaded circuit or a cord under strain, and it’s worth addressing immediately rather than waiting for a bigger problem.
Why Workflow Should Beat Design Every Time
Beauty matters, but a gorgeous appliance garage you avoid opening because it’s inconvenient just becomes expensive clutter storage. Pick the door mechanism and location that fit how you actually cook first, then choose finishes that match your kitchen. Kitchen Devotion’s product picks work because they’re chosen with that order in mind, not the reverse.
Curated Appliances That Make Hiding Them Easier
Some appliances are simply easier to conceal than others. A slim, single-function toaster tucks into a garage far more easily than a bulky multi-cooker with a domed lid, and Kitchen Devotion curates its picks with exactly that kind of footprint in mind. The site’s kitchen appliance priority list for new homeowners helps you decide which machines earn a spot in your accessible storage and which ones can move to the pantry.
If your goal is a counter that stays clear without giving up convenience, start with appliances built for compact storage in the first place. Kitchen Devotion’s time-saving appliance picks for busy cooks highlights compact, multi-use machines that fit standard garage and cabinet dimensions instead of forcing you to custom-build around an oversized unit. Browse the list, match a model to the cabinet space you’ve measured, and order with confidence that it’ll actually fit behind the door you picked.
Sources
- The Creative Kitchen Solution Designers Are Using to Streamline Countertops — HouseBeautiful
- 4 Smart Ways Designers Hide Kitchen Appliances — Southern Living
- This Hidden Kitchen Storage Is Back for 2026 — HomeEdit
FAQ
What Is the 50/50 Rule for Appliances?
There’s no single official standard, but many kitchen organizers use it to mean keeping roughly half your countertop appliances out for daily use and storing the other half, splitting space evenly between visible and concealed storage.
How Do You Hide Appliances in a Kitchen?
The main methods are appliance garages with tambour, lift-up, or pocket doors, roll-out trays and lift shelves in base cabinets, and freestanding options like hutches or a walk-in pantry for seasonal machines.
Can You Hide a Microwave on the Counter?
Yes, a microwave can go behind a tambour or lift-up appliance garage door as long as the cabinet has at least 16 to 18 inches of interior depth and a nearby outlet; built-in trim kits also let it sit flush inside upper cabinetry.
How Do You Hide Items on a Kitchen Counter?
Sort items by how often you use them, then move daily tools to an appliance garage or open shelf, weekly tools to a roll-out tray, and occasional items to a pantry or lower cabinet drawer.





No comment