

Your blender not blending while the blade still spins usually means cavitation, an air pocket forming around the blade, or an overloaded jar. It is almost never a dead motor. Add a splash of liquid, drop the speed to pulse, and scrape or rearrange the ingredients before you assume anything is broken. Unplug the unit before you reach in, and if it shut off on its own, give the motor a few minutes to cool before trying again.
TL;DR:
- Cavitation caused by frozen ingredients colder than 10°F or improper layering is the most common reason blades spin without blending efficiently.
- Worn or damaged parts like dull blades, cracked jars, or broken drive couplers are signs that repair or replacement is needed, especially if the water test shows minimal blade movement.
- Mechanical overloading or overheating triggers thermal protection, requiring the blender to rest for up to 15 minutes before restarting to prevent motor damage.
- Proper loading techniques, such as adding liquid first, layer soft ingredients beneath frozen ones, and avoiding full-speed operation initially, prevent most stalls.
- Worn gasket, blade assembly, or drive coupler replacements are cost-effective solutions for persistent issues, whereas signs like burning smells or RPM drops suggest the base may need professional repair or replacement.
Table of Contents
- Quick Fixes for a Blender Not Blending Right Now
- Why Is My Blender Not Blending? Common Causes Explained
- Step-by-Step Troubleshooting Checklist for a Blender That Won’t Blend
- Should You Repair the Blender or Replace It?
- How to Keep Your Blender From Stalling Again
- Why Trust This Blending Troubleshooting Guide
- A Final Word on Blender Troubleshooting
- Upgrade or Restock: Kitchen Devotion’s Blender Picks
- Sources
- FAQ
Quick Fixes for a Blender Not Blending Right Now
Most stalled blends come back to life with a few small changes, not a repair kit. Work through these in order, since each one rules out a different problem before you move to the next.
- Unplug it and look inside. Check for a jammed piece of ice, a stray fruit pit, or anything wedged under the blades before doing anything else.
- Add liquid. A half cup of water, milk, or juice breaks up a stuck load more reliably than any amount of extra speed.
- Reload with liquid on the bottom. Dense or frozen ingredients sitting on top of liquid, not under it, give the blades something to grab.
- Pulse instead of blasting full speed. Short bursts let ingredients settle back toward the blade between pulses, which a full-speed run does not allow.
- Use the tamper if your model has one. It pushes stuck food down into the blades without you reaching near a running blade.
- Thaw rock-hard frozen chunks for 5 to 10 minutes. Frozen fruit straight from a deep freezer is often colder and harder than the blender was designed to chew through.
- Keep the jar at two-thirds full or less. Split a big batch into two smaller ones instead of forcing one oversized load.
- If it just shut off, let it rest. Manufacturer guidance on thermal shutoffs recommends waiting up to 15 minutes before restarting a unit that tripped its overload protection.
Pro Tip: Never poke a spoon or spatula into the jar while the blender is running. Stop the machine, unplug it, scrape the sides, and restart. It’s a small habit that keeps fingers safe and blades intact.
If none of that gets things moving, the problem is likely something more specific than a bad batch, and that’s worth diagnosing properly.
Why Is My Blender Not Blending? Common Causes Explained
Three categories cover almost every case: air pockets, mechanical wear, and heat protection kicking in.
Cavitation is the technical term for what’s happening when the blade spins fast but the food just spins with it instead of getting cut. This happens when there’s too much frozen or solid content and not enough liquid to create suction. KitchenAid’s own product guidance recommends keeping frozen ingredients no colder than around 10°F (about negative 12°C) to cut down on stalling, since ice that’s too hard simply won’t yield to the blade.
Jar shape plays a bigger role than most people realize. A narrow jar with straight sides struggles to form the swirling vortex that pulls ingredients down into the blades, while a wider base with angled walls keeps food cycling. That’s part of why two blenders with the same wattage can perform very differently on the same smoothie.
Mechanical issues show up differently:
- Dull blades batter fruit and ice instead of slicing them, leaving chunks that never fully break down.
- A worn drive coupler (the part connecting the base’s motor to the blade shaft) can slip under load, spinning the blade slower than the motor itself.
- A cracked jar or worn gasket lets contents leak or air escape, killing the suction that normally pulls food downward.
Here’s a fast way to tell them apart: if the blade sounds fast and steady but nothing moves, that’s cavitation. If the sound bogs down, strains, or the motor smells hot, you’re looking at an overload or a mechanical fault, and continuing to run it risks real motor damage.
Step-by-Step Troubleshooting Checklist for a Blender That Won’t Blend
Work through this sequence in order. Each step either fixes the problem or narrows down what’s actually wrong.
- Unplug the blender and remove the jar. Look for obstructions around the blade and check that nothing is wedged in the base coupling.
- Run a water test. Fill the jar halfway with plain water and run it on low. If the water spins freely and pulls into a visible vortex, the blade and drive are engaging fine, and your issue was almost certainly loading or ratio.
- Reload correctly. Liquid first, then soft ingredients, then frozen or hard pieces on top. Start on low and ramp up gradually rather than hitting the highest setting immediately.
- Inspect the blade assembly if it’s still not working. Remove it (unplugged, always) and check the coupling and gasket underneath for cracks, stripped grooves, or a loose fit.
- Contact the manufacturer if none of this helps. A burning smell, a motor that won’t reach normal speed, or a unit still under warranty are all reasons to call support instead of opening the base yourself.
A blender spinning at full speed with nothing happening in the jar is telling you something specific: it’s not a broken machine, it’s a machine that has nothing to grab onto. Fix the grip, not the motor.
If the water test fails, meaning the blade barely turns or doesn’t turn at all, that points toward a mechanical problem rather than a loading mistake, and it’s time to think about parts or replacement.
Should You Repair the Blender or Replace It?
The water test from the checklist above usually tells you which direction to go. If the blade turns freely with nothing in the jar, the fix is almost always technique, not hardware.
A few parts are worth replacing rather than fighting with:
- Blade assemblies wear down after years of ice and frozen fruit; a dulled blade batters food instead of cutting it, and professionals generally recommend swapping the whole assembly rather than trying to sharpen it at home.
- Gaskets are cheap, small, and the most common reason a jar leaks or loses suction over time.
- Drive couplers slip or crack after heavy use and are usually sold as standalone replacement parts by the manufacturer.
Watch for red flags that point to the base itself failing: a burning smell, a noticeable drop in RPM once food is added, or a motor that runs hot even on light loads. Those are signs a repair might cost more than it’s worth.
Before calling support, find the model and serial number, usually on a sticker on the base. Manufacturers use that information to confirm warranty status and send the correct replacement part instead of a generic one.
How to Keep Your Blender From Stalling Again
A few habits prevent most of the problems covered above before they start.
- Layer every load the same way: liquid on the bottom, soft produce next, frozen or hard ingredients last.
- Limit frozen content to roughly a third of the jar, and pre-thaw large chunks for a few minutes rather than dropping in ice-hard fruit straight from the freezer.
- Start low, then ramp up. Jumping straight to the highest setting is one of the most common ways to trigger cavitation instead of preventing it.
- Use pulses for dense loads and the tamper (if included) instead of shaking the jar or adding more liquid mid-run.
- Clean and check the blade edges, gasket, and coupling every few months. Catching a worn gasket early is a five-dollar fix; catching it late can mean a cracked jar.
Pro Tip: If you make the same frozen smoothie recipe often, weigh or measure your frozen fruit once and stick to that amount. Consistency in loading prevents the guesswork that leads to most stalls.
Why Trust This Blending Troubleshooting Guide
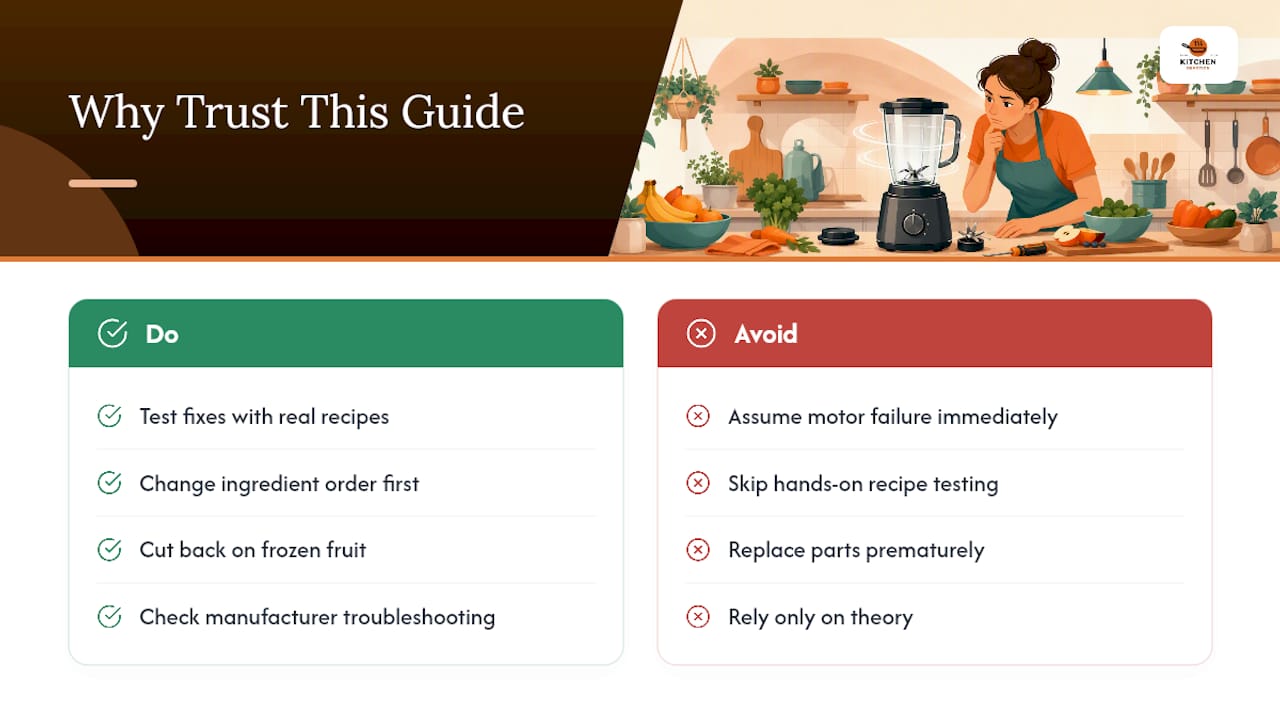
Kitchen Devotion tests fixes against real recipes, not just theory, using our blender recipes as the proving ground for techniques like layering order and pulse-ramping. Home-cook reports consistently back this up too: changing ingredient order and cutting back on frozen fruit resolves what looks like a power problem far more often than a failing motor does.
This guide was written by K. Connors for Kitchen Devotion, drawing on manufacturer troubleshooting documentation and hands-on recipe testing across the site’s blender category. The goal is straightforward: give you the fix that actually works before you consider anything more drastic.
A Final Word on Blender Troubleshooting
Most blending failures are technique, not hardware. Try the water test before you assume the worst. When in doubt, unplug, check, and contact the manufacturer. Have a specific model acting up? Mention it below and we’ll help narrow it down.
— K. Connors
Upgrade or Restock: Kitchen Devotion’s Blender Picks
If you’ve run the water test and the blade barely moves, no amount of technique will fix a worn coupler or a cracked jar. That’s where buying a replacement part or a new machine actually makes sense, and it’s worth shopping with a wider base and angled jar walls in mind, since that shape does more for vortex formation than horsepower alone.

Kitchen Devotion’s Blenders category is curated specifically around that kind of practical fit: models built for frozen-heavy smoothies sit next to lighter options for everyday use, so you’re not guessing between fifteen nearly identical machines. If you’re leaning toward more power for ice and frozen fruit, the Nutribullet Full-Size Blender Combo is worth a look, and if you want to test any fix or new machine against a real recipe first, our blender recipes collection is a good place to start. Browse the blender category to compare picks before deciding whether to repair or replace.
FAQ
Why Is My Blender Turning On but Not Blending?
The motor and blade are working, but there’s likely an air pocket around the blade instead of solid contact with the ingredients. Add liquid, rearrange with liquid on the bottom, and pulse rather than running at full speed right away.
How Do You Fix a Blender That Won’t Spin?
If the blade won’t turn at all, even with the jar empty, run the water test: fill it halfway with water and try low speed. No movement usually points to a worn drive coupler or a jammed blade, which means it’s time to check the manufacturer’s operation guidance or contact support for a replacement part.
Why Is My Smoothie Not Blending Smoothly?
This is almost always a ratio and layering issue. Too much frozen fruit and not enough liquid creates cavitation, so add a splash more liquid, put it in first, and layer softer produce before the frozen pieces.
My Ninja Blender Isn’t Blending. What Can I Do to Fix It?
Unplug it, remove the jar, and check for jammed ice or obstructions around the blade. Then reload with liquid first, use pulse mode instead of a continuous run, and if it shut off on its own, wait up to 15 minutes for the thermal protection to reset before trying again.
When Should I Replace My Blender Instead of Fixing It?
Replace it when the water test shows the blade barely moving, or when you notice a burning smell, a steep RPM drop under light loads, or a jar that’s visibly cracked. For anything less severe, a new blade assembly, gasket, or coupler from the blender category usually solves it for far less than a full replacement.





No comment