
What actually happens when you bake bread?
Every loaf follows the same seven foundational stages: mixing, gluten development, bulk fermentation, degassing, shaping, proofing, and baking. Each one builds on the last, and skipping or rushing any stage shows up in the final loaf.
- Mixing: Combines ingredients and starts hydrating the flour.
- Gluten development (kneading): Kneading until smooth and elastic builds the protein network that traps gas and gives bread its chew.
- Bulk fermentation: The first rise. Yeast feeds on sugars, produces CO2, and develops flavor.
- Degassing: Gently pressing the dough releases built-up gas for an even crumb later.
- Shaping: Creates surface tension so the loaf rises up rather than spreading flat.
- Proofing: The second rise, after shaping. Timing varies widely by dough size and room temperature.
- Baking: Heat sets the structure, browns the crust, and finishes the loaf.
Fermentation and proofing are the most temperature-sensitive stages. Yeast activity roughly doubles with every 17°F increase in dough temperature, so a warm kitchen speeds things up considerably.
How to measure ingredients for consistent results
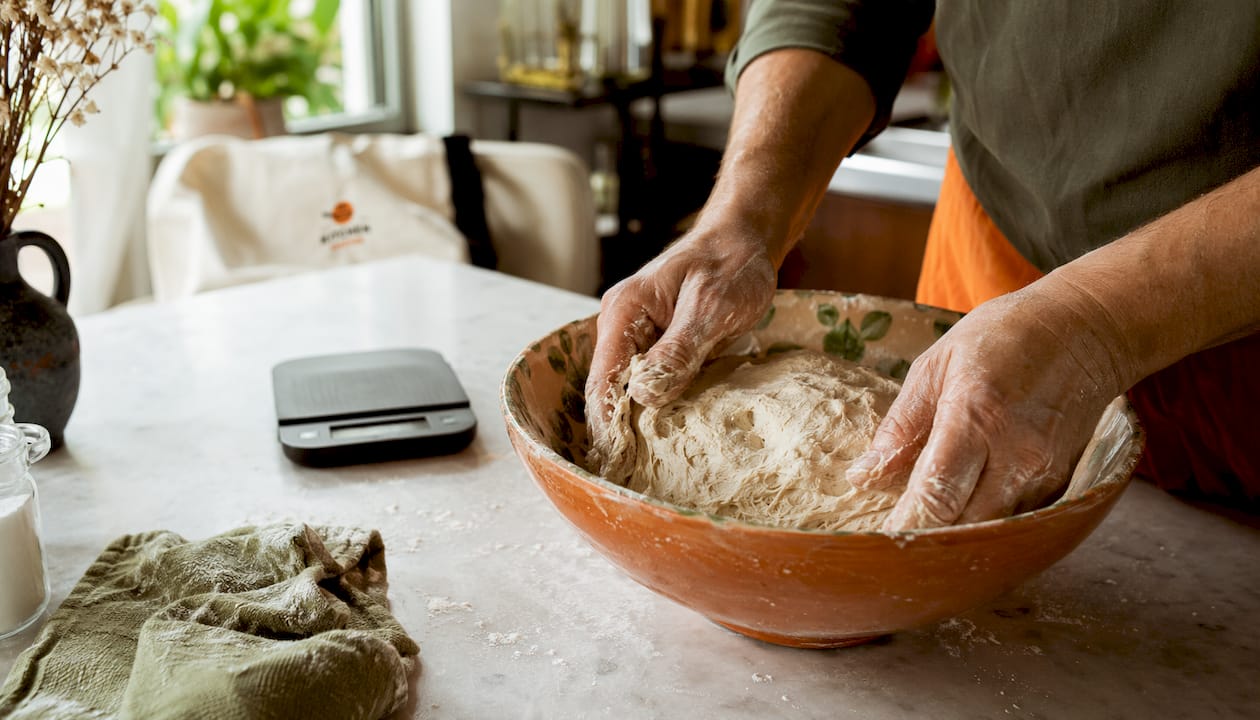
Weight beats volume every time in home bread making. A cup of flour can vary by 20% or more depending on how it’s scooped, but a gram is always a gram. A digital kitchen scale accurate to 1 gram, with a capacity of at least 5 pounds, covers every bread recipe you’ll encounter.
Pro Tip: Zero out (tare) your scale between each ingredient added to the same bowl. This prevents cumulative errors and makes cleanup faster.
Common measurement mistakes to avoid:
- Scooping flour directly from the bag compacts it and adds too much.
- Using a liquid measuring cup for dry ingredients gives inconsistent results.
- Eyeballing small amounts of yeast or salt throws off fermentation and flavor.
- Skipping the scale for water means hydration varies batch to batch.
For a deeper look at choosing the right scale, Kitchendevotion’s beginner’s scale guide covers what to look for without the jargon. A high-precision digital scale with a timer also works well for tracking fermentation alongside weighing.
How to test yeast and fix activation problems
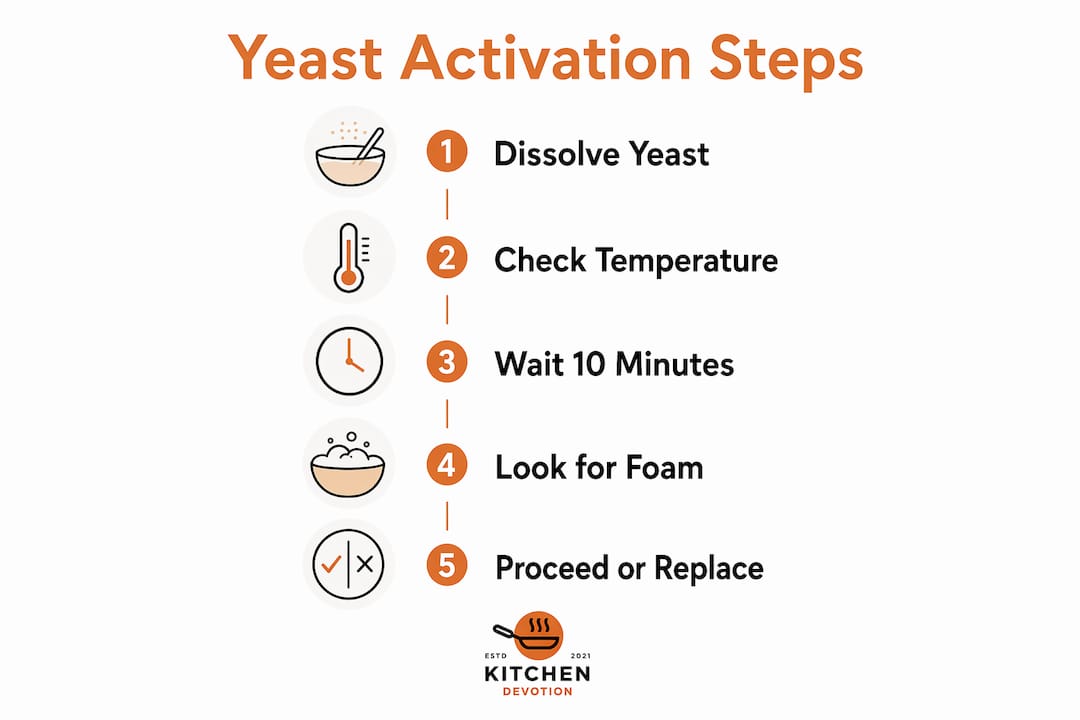
Dead yeast is the single most common reason a loaf never rises. The fix is simple: test before you mix. Dissolve yeast in warm water between 105°F and 115°F with a pinch of sugar. If no foam appears within several minutes, the yeast is inactive and should be replaced.
Temperature is the critical variable. Water above a safe temperature threshold starts killing yeast cells. King Arthur Baking offers a practical rule: water comfortable on your wrist is the right temperature for yeast.
Step-by-step yeast test:
- Warm about half a cup of water to a temperature comfortable to the skin, in the ideal range for activating yeast.
- Add a pinch of sugar and stir.
- Sprinkle in the yeast and wait 10 minutes.
- Active yeast foams and bubbles visibly. No foam means replace it.
If your dough rises then collapse, the culprit is usually over-fermentation, not bad yeast. Shape sooner next time and reduce bulk fermentation time.
How to tell when your dough is ready to bake
The poke test is the most reliable low-tech method master bakers use. Press a floured finger about ½ inch into the proofed dough. If the indent springs back slowly and leaves a slight impression, the dough is ready. If it springs back immediately, it needs more time. If it doesn’t spring back at all, it’s over-proofed.
Visual and tactile cues of well-proofed dough:
- Noticeably puffier than when shaped, but not doubled.
- Feels light and slightly jiggly when the pan is shaken.
- Surface looks smooth, not wrinkled or collapsed.
Proofing mistakes and fixes:
- Under-proofed: Dense crumb, thick crust, little oven spring. Give it more time in a warmer spot.
- Over-proofed: Flat loaf, large tunnels, collapsed structure. Bake immediately and expect reduced oven spring.
A warm, draft-free environment speeds proofing. An oven with just the light on works well as a makeshift proofing chamber.
Which kitchen tools actually improve your bread?
The right equipment removes guesswork. Here’s what genuinely matters:
- Digital kitchen scale: Non-negotiable for consistent results (see the measurement section above).
- Instant-read thermometer: Confirms bread doneness without cutting into the loaf.
- Oven thermometer: Most home ovens run cooler than the dial setting by a noticeable margin, affecting baking results. An independent thermometer catches this.
- Bench scraper: Divides dough cleanly and lifts sticky dough off the counter.
- Proofing basket (banneton): Holds shaped dough during the final rise and imprints a professional pattern.
- Cooling rack: Lets air circulate under the loaf so the bottom crust stays crisp.
- Mixing bowls: A large, heavy bowl prevents dough from climbing out during mixing.
Pro Tip: A stand mixer with a dough hook handles kneading reliably, but use it only for mixing and kneading. Bread baked entirely in a bread machine tends to have inferior shape and texture.
For a full rundown of what to buy first, Kitchendevotion’s home baking tools guide breaks it down by priority.
Mixing and kneading: what you’re actually trying to do
The goal of kneading is gluten development, not just combining ingredients. Gluten forms when flour proteins hydrate and align into elastic strands. Knead by pushing the dough away with the heel of your hand, folding it back, rotating a quarter turn, and repeating. Eight to ten minutes by hand produces a smooth, elastic dough that passes the windowpane test: stretch a small piece thin enough to see light through without tearing.
No-knead recipes skip this step by using time instead. A long, slow fermentation builds gluten structure naturally, which is why a 12-hour cold-proof loaf can have excellent texture with zero kneading. Both methods work; kneading is just faster.
Over-kneading is rarely a problem by hand, but a stand mixer can over-develop gluten if left running too long. Stop when the dough is smooth and pulls cleanly from the bowl.
Shaping and scoring: why they matter more than you’d think
Shaping builds surface tension that directs the loaf’s rise upward. A loosely shaped loaf spreads sideways and bakes flat. For a round loaf, tuck the dough under itself repeatedly while rotating it on the counter until the surface feels taut. For a batard or sandwich loaf, use a series of letter folds before rolling it tight.
Scoring, cutting the surface with a sharp blade just before baking, controls where the loaf expands in the oven. Without a score, the crust cracks randomly. A single slash at a 30-degree angle works for most loaves. A lame (a razor blade on a handle) cuts more cleanly than a knife and gives you better control over depth.
Baking temperatures and timing
Most artisan-style loaves bake at 450°F–475°F. Enriched doughs like brioche or soft sandwich bread bake lower, around 350°F–375°F, because the sugar and fat brown faster. Preheat the oven for at least 15–20 minutes before loading the bread.
Steam in the early minutes of baking helps develop a glossy, crackly crust on artisan loaves. Steam facilitates Maillard browning and prevents the crust from setting too early. A Dutch oven with the lid on for the first 20 minutes traps steam naturally. Alternatively, place a pan of boiling water on the oven floor when loading the bread.
Bread is done when its internal temperature reaches 200°F–210°F. A deep brown crust, not golden, is the visual target. Most home bakers pull their loaves too early.
Cooling and storing your finished loaf
Cut into bread too soon and the interior turns gummy. The crumb is still setting as the loaf cools, and slicing interrupts that process. Wheat sourdough needs at least 2 hours on a rack before cutting. Rye loaves need 24–72 hours depending on the rye percentage.
For storage, a bread box or paper bag keeps the crust crisp for 2–3 days. Plastic bags soften the crust but extend freshness slightly. For longer storage, slice and freeze. Frozen bread toasts directly from the freezer with no quality loss.
Common bread baking mistakes and how to fix them
Most failures trace back to three causes: fermentation timing, temperature, and hydration. Here are the ones that trip up home bakers most often:
- Under-baking: The most common mistake. Pull bread only when the internal temperature reaches the proper range and the crust is deep brown.
- Inaccurate oven temperature: Verify with a standalone oven thermometer. A 50°F error changes everything.
- Killing the yeast: Water above 116°F is the culprit. Stick to the 105°F–115°F range.
- Skipping the scale: Volume measurements introduce inconsistency that compounds across every bake.
- Adding too much flour when dough sticks: Use wet hands and a bench scraper instead. Extra flour tightens the crumb.
- Cutting the loaf too soon: Gummy interior every time. Wait the full cooling period.
Ready to build out your baking setup? Kitchendevotion’s kitchen appliance priority list helps you decide what to buy first without overspending.

Key Takeaways
Accurate measurement, proper yeast activation, and baking to an internal temperature of 200°F–210°F resolve the majority of home bread baking failures.
| Point | Details |
|---|---|
| Weigh ingredients | A digital scale accurate to 1 gram produces more consistent dough than volume measures. |
| Test yeast first | No foam after 10 minutes in 105°F–115°F water means the yeast is inactive. |
| Use an oven thermometer | Most home ovens run 25–50°F cooler than the dial, which directly affects baking results. |
| Bake to temperature | Pull bread only when the internal temperature reaches 200°F–210°F and the crust is deep brown. |
| Cool before cutting | Slicing wheat sourdough before 2 hours of cooling produces a gummy interior. |
FAQ
What temperature should water be for activating yeast?
Water should be between 105°F and 115°F. Temperatures above 116°F begin killing yeast cells, while cold water slows activation significantly.
How do I know when bread is fully baked?
Check the internal temperature with an instant-read thermometer. Bread is done at 200°F–210°F, and the crust should be deep brown, not golden.
What is the poke test for proofing?
Press a floured finger ½ inch into the dough. If the indent springs back slowly and leaves a slight impression, the dough is ready to bake.
Why did my bread turn out dense?
Dense bread usually means under-fermentation, inactive yeast, or too much flour added during kneading. Test your yeast before mixing and weigh ingredients for accuracy.
How should I store homemade bread?
Keep it in a bread box or paper bag for 2–3 days to preserve crust texture. For longer storage, slice and freeze; it toasts well directly from frozen.




No comment