
Weigh your ingredients, calibrate your oven, and stop mixing the moment the recipe says to. Those three moves alone fix the majority of home-baking failures. Everything else builds on them.
Here are the highest-impact changes you can make before your next bake:
- Weigh, don’t scoop. A cup of all-purpose flour can weigh anywhere from 120 g to 150 g depending on how packed it is. That’s a 20–25% swing that changes texture every time.
- Verify your oven temperature. Most home ovens run several degrees off the dial. An oven thermometer costs under $10 and removes the guesswork.
- Use room-temperature dairy and eggs. Cold butter or eggs can break an emulsion and produce a lumpy batter.
- Read the entire recipe before you start. Missed steps like “chill dough for 1 hour” or “separate eggs” derail more bakes than bad technique.
- Don’t open the oven door early. Opening the door during the first two-thirds of bake time can drop oven temperature by 25–50°F and collapse a cake that hasn’t set.
- Stop mixing when the recipe says to. Overmixing develops gluten and toughens cakes, muffins, and quick breads.
- Test your leaveners. Old baking powder or dead yeast is the silent killer of flat bakes.
- Cool on a wire rack. Leaving baked goods in the pan traps steam and creates soggy bottoms.
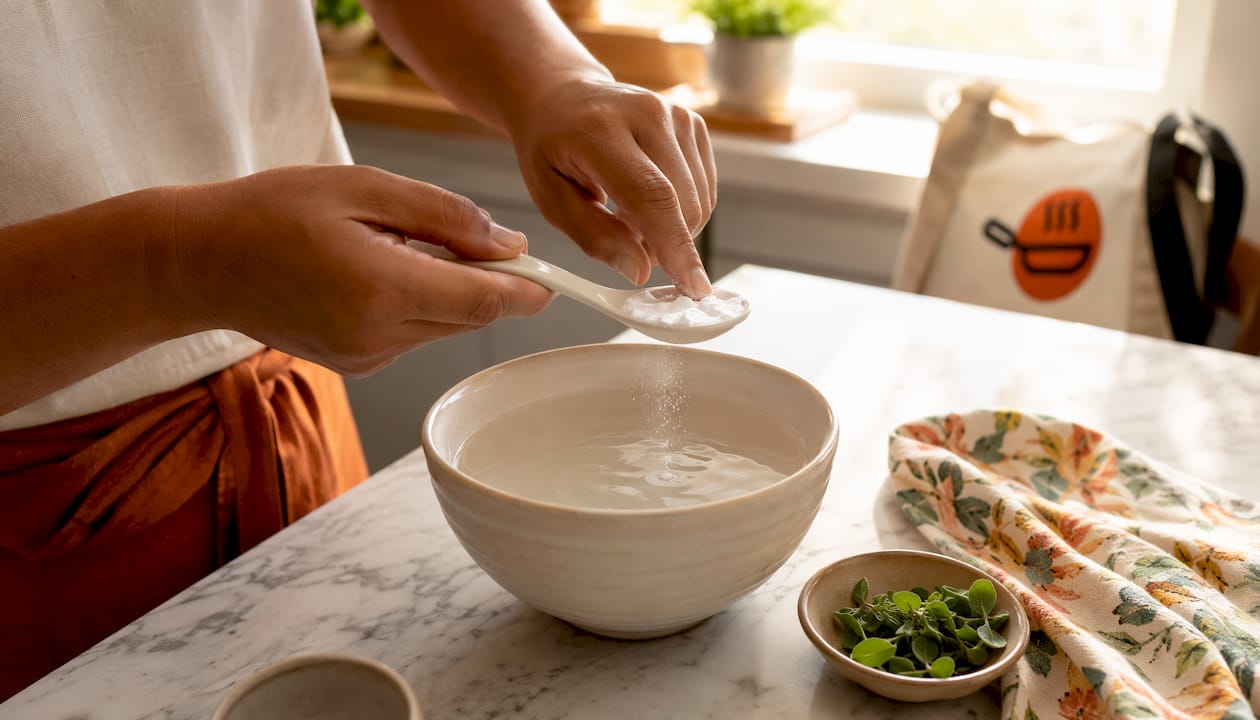
Pro Tip: To test baking powder freshness in under 30 seconds, drop a teaspoon into hot water. Strong, immediate bubbling means it’s active. Weak fizz or nothing means it’s time to replace it.
Table of Contents
- What tools and pantry staples do you actually need?
- How to measure ingredients correctly
- Does your oven actually run at the temperature you set?
- Why reading the recipe first saves you from most mistakes
- How mixing technique affects texture
- How to test leaveners before you bake
- Why every ingredient has a job (and what happens when you swap them)
- Troubleshooting common baking problems
- How to store and freeze doughs and finished bakes
- Quick rules by recipe type: cakes, cookies, bread, and pies
- Key Takeaways
- The pre-bake checklist that actually works
- The right gear makes every baking tip stick
- Useful sources and further reading
- FAQ
What tools and pantry staples do you actually need?
The good news: you don’t need a fully stocked professional kitchen. A handful of well-chosen tools deliver the biggest reliability gains.
The highest-ROI tools
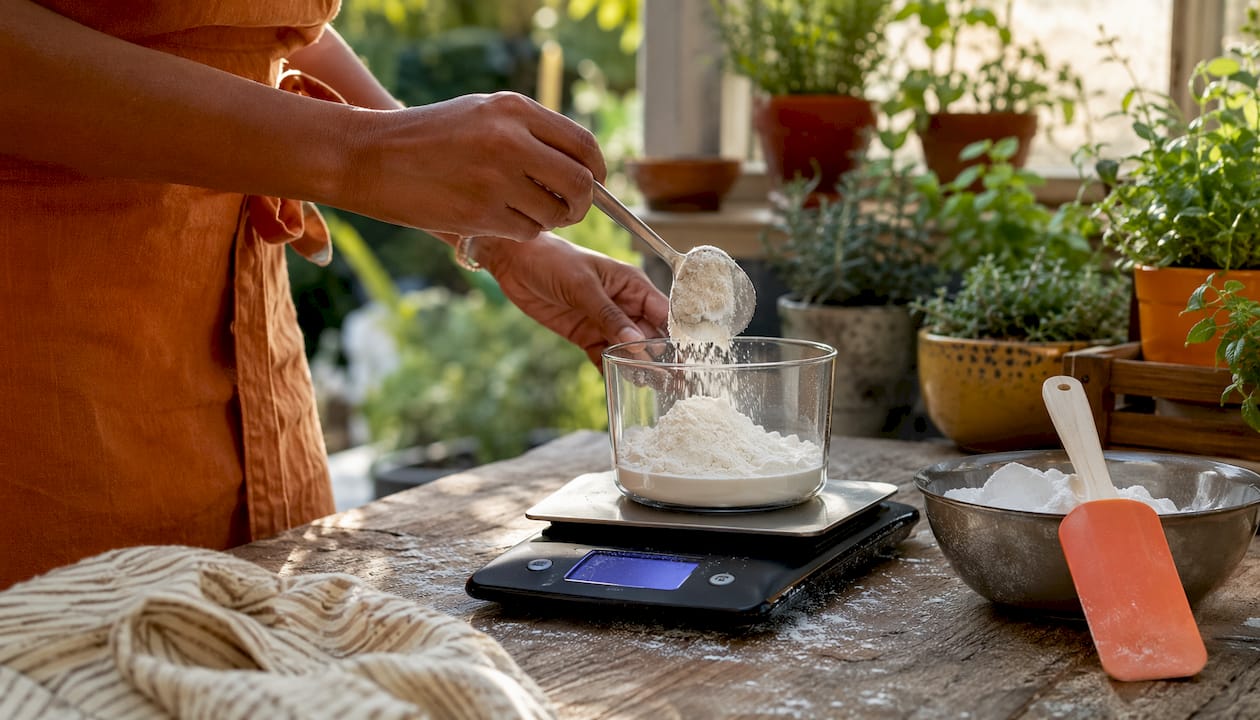
A digital kitchen scale is the single most important purchase a home baker can make. It costs $15–$30 and eliminates the measurement variance that causes more failures than any technique error. After that, an oven thermometer (under $10) tells you what your oven is actually doing. These two tools outperform a $400 stand mixer for improving consistency.
Beyond those, you’ll want: a set of dry and liquid measuring cups (keep both), a rubber spatula, a bench scraper, a wire cooling rack, a pastry brush, and at least two rimmed baking sheets. A stand mixer is nice but not necessary for most home baking. A hand mixer handles most jobs at a fraction of the price.
For pantry staples, keep these on hand: all-purpose flour, baking powder, baking soda, active dry yeast, unsalted butter, granulated and brown sugar, salt, pure vanilla extract, large eggs, neutral oil, and parchment paper. Parchment is non-negotiable. It prevents sticking without adding flavor, and it makes cleanup effortless.
Splurge on the scale and a good set of baking prep tools. Save money on mixing bowls and spatulas. A well-organized baking space also helps. If your kitchen storage is working against you, a few smart cabinet upgrades can make a real difference in workflow.
How to measure ingredients correctly
The single biggest consistency improvement most home bakers can make is switching from cups to grams. Measuring flour by volume introduces a 20–25% variance in weight depending on how the flour is scooped or packed. That variance shows up directly in texture: too much flour makes cakes dense and cookies dry; too little makes them spread or collapse.
Step-by-step: weighing on a scale
- Place your mixing bowl on the scale and press tare (zero it out).
- Add the first ingredient until the display hits the target weight.
- Press tare again, then add the next ingredient directly into the same bowl.
- For sticky ingredients like honey or peanut butter, spray the bowl lightly with cooking spray first.
If you’re still using cups, use the spoon-and-level method: fluff the flour in its container, spoon it into the measuring cup, and level the top with the back of a knife. Never scoop directly from the bag. Scooping compacts the flour and can add 20–30% more than the recipe intends.
| Ingredient | Cup measure | Typical weight range | Impact of over-measuring |
|---|---|---|---|
| All-purpose flour | 1 cup | 120–150 g | Dense crumb, dry texture |
| Granulated sugar | 1 cup | 195–210 g | Minimal variance |
| Cocoa powder | 1 cup | 85–100 g | Bitter, dry result |
| Brown sugar (packed) | 1 cup | 200–220 g | Minimal variance |
Liquid ingredients are more forgiving by volume, but use a liquid measuring cup (the kind with a spout) placed on a flat surface and read at eye level.
Pro Tip: Convert your favorite recipes to grams the first time you make them. Write the weights directly on the recipe card. You’ll never go back to cups.
Does your oven actually run at the temperature you set?
Probably not. Many home ovens run 10–25°F off from the set temperature, and most bakers never check. That offset is consistent and fixable once you know it.
How to map your oven
Place an oven thermometer in the center of the middle rack. Set the oven to 350°F and let it preheat for at least 20 minutes. Read the thermometer. If it reads 325°F, your oven runs 25°F cold. From now on, set it to 375°F when a recipe calls for 350°F.
Hot spots are a separate issue. To find them, place a sheet of white sandwich bread across the entire rack and bake at 350°F for a few minutes. The darker pieces show the hot zones. Once you know where they are, rotate your pans 180 degrees halfway through every bake.
Rack placement matters. The center rack gives the most even heat for cakes and cookies. Move to the lower third for pies and tarts (crisper bottoms) and the upper third for broiling or browning tops. Convection fans circulate heat and reduce baking time by roughly 25°F or about 20–25% of the time. When using convection, either lower the temperature by 25°F or shorten the time.
At high altitudes (above 3,500 feet), leaveners work more aggressively and liquids evaporate faster. Reduce baking powder by about 25%, add a tablespoon or two of extra liquid, and increase oven temperature by 15–25°F. Humidity has the opposite effect: on very humid days, flour absorbs moisture from the air, so baked goods may need slightly less added liquid.
Why reading the recipe first saves you from most mistakes
Mise en place, the French kitchen discipline of having everything measured and ready before you start, is the single habit that separates reliable bakers from frustrated ones. It takes five extra minutes and prevents the kind of mid-bake scramble that leads to overmixed batter, forgotten salt, or cold eggs dropped into warm butter.
Before you turn on the oven, run through this checklist:
- Read the full recipe once. Look for steps that require advance prep: chilling dough, soaking dried fruit, or separating eggs.
- Pull all ingredients. Check that you have everything before you start, not halfway through.
- Bring dairy and eggs to room temperature. Cold eggs can cause butter to seize; cold milk can curdle a batter. Set them out 30–60 minutes ahead.
- Pre-measure everything. Weigh or measure each ingredient into its own small bowl or cup.
- Prep your pans. Grease, flour, or line with parchment before the batter is ready. A batter sitting in a bowl while you hunt for parchment paper is a batter developing gluten.
- Preheat the oven. Give it at least 20 minutes, not the 5 minutes most people allow.
- Set a timer. Check at the minimum bake time, not the maximum.
Timing overlaps trip up even experienced bakers. If a recipe has two components (a curd and a pastry shell, for example), map out which one takes longer and start it first.
How mixing technique affects texture
Follow the recipe’s mixing method and stop when it says to. That’s the whole rule. Everything else is understanding why.
Creaming butter and sugar traps air in the fat, which expands in the oven and lifts the cake. For this to work, butter needs to be soft enough to press an indent with your finger but not greasy or melting. The target is roughly 65–68°F. Butter that’s too cold won’t cream; butter that’s too warm won’t hold air. Cream until the mixture is pale, noticeably lighter in color, and fluffy, usually 3–5 minutes with a hand mixer.
Folding is the opposite of creaming. You use it when air is already in the batter (from whipped egg whites or a whipped cream base) and your job is to incorporate dry ingredients without deflating it. Use a wide rubber spatula, cut down through the center, sweep along the bottom, and fold up and over. Rotate the bowl a quarter turn and repeat. Stop the moment you no longer see streaks of flour.
Overmixing is the most common mistake in quick breads, muffins, and pancakes. Once flour hits liquid, gluten starts developing. The more you mix, the tougher the result. Lumps in muffin batter are fine. They bake out.
Common mixing mistakes and quick fixes:
- Butter too cold for creaming: Grate cold butter on a box grater and let it sit 10 minutes. It comes to temperature much faster than a whole stick.
- Overmixed cake batter: Nothing reverses it, but you can minimize the damage by baking immediately and not opening the oven early.
- Undermixed folded batter: A few visible flour streaks are better than a flat, deflated result. Fold gently until just combined.
How to test leaveners before you bake
Test your leaveners before every bake if they’ve been open for more than six months. The tests take under a minute and save an entire batch.
- Baking powder: Drop 1 teaspoon into ½ cup of hot water. Active powder bubbles immediately and vigorously. Weak fizz means it’s spent.
- Baking soda: Drop ¼ teaspoon into a small amount of white vinegar or lemon juice. It should fizz strongly. No reaction means it’s dead.
- Active dry yeast: Dissolve 1 teaspoon in ¼ cup of warm water (105–110°F) with a pinch of sugar. After 5–10 minutes, it should be foamy and smell yeasty. If nothing happens, the yeast is dead or the water was too hot.
Baking powder and baking soda are chemical leaveners: they produce CO₂ through acid-base reactions. Baking soda needs an acid in the recipe (buttermilk, yogurt, brown sugar, cocoa) to activate. Baking powder contains its own acid and works in two stages: once when wet, once when heated. Yeast is biological: it produces CO₂ through fermentation, which is why bread dough needs time to rise.
One critical timing rule: bake immediately after mixing baking soda into a batter. Baking soda reacts on contact with liquid. Letting the batter sit means the CO₂ escapes before the oven can set it. Baking powder is more forgiving because its second activation happens in the heat.
When adjusting leavener amounts, change by no more than 25% at a time and test one variable per bake. Too much baking powder causes cakes to rise fast and then collapse.
Why every ingredient has a job (and what happens when you swap them)
Each major ingredient performs a predictable structural or flavor role: flour provides gluten structure, fat creates tenderness, sugar adds moisture and drives browning, eggs bind and emulsify, and leaveners supply lift. Understanding these roles makes substitutions less of a gamble.
Safe substitution rules:
- Milk: Swap 1:1 with any dairy or non-dairy milk (oat, almond, soy). Buttermilk can replace regular milk but adds acidity, so reduce baking powder slightly and add a pinch of baking soda.
- Butter: Replace with an equal weight of neutral oil for moisture-forward recipes (banana bread, muffins). You’ll lose the creaming function and some flavor. Coconut oil works but adds a mild coconut note.
- Eggs: One egg can often be replaced with 1 tablespoon of ground flaxseed mixed with 3 tablespoons of water (let it gel for 5 minutes). This works for binding but not for lift.
- All-purpose flour: Swapping 1:1 with bread flour increases gluten and toughens cakes. Cake flour has less protein and produces a more tender crumb. Never swap almond or coconut flour 1:1 for AP flour; they behave completely differently.
- Liquid sweeteners (honey, maple syrup): These add extra moisture. Reduce other liquids by about 3 tablespoons per cup of liquid sweetener used.
Measurement matters more than most bakers realize. Measuring flour by volume introduces a 20–25% variance in weight, which directly changes the flour-to-liquid ratio and the final texture of the bake.
When experimenting with substitutions, change one variable per batch. Two swaps at once make it impossible to know which one caused the result.
Troubleshooting common baking problems
The core rule: isolate one variable and test it on the next bake. Changing three things at once tells you nothing.
Symptom → Likely cause → Quick fix:
- Cake sinks in the center: Oven door opened too early, underbaked, or too much leavener. Keep the door closed until the minimum bake time. Verify oven temp with a thermometer.
- Dry, crumbly crumb: Too much flour (over-measured) or overbaked. Switch to weighing. Check oven temperature. Brush warm cake with simple syrup to recover moisture.
- Cookies spread flat: Butter too warm, dough too warm, or too little flour. Chill dough for 30 minutes before baking. Never place dough on a hot sheet pan.
- Dense, heavy bread: Under-proofed yeast or dead yeast. Test yeast before mixing. Give dough more time in a warm spot.
- Soggy bottom on pies or tarts: Underbaked base or too much filling moisture. Blind-bake the crust first. Use the lower oven rack for more direct bottom heat.
- Tough muffins or quick breads: Overmixed. Mix only until flour disappears. Lumps are fine.
- Uneven browning: Hot spots in the oven. Rotate pans 180 degrees at the halfway mark.
Pro Tip: If the outside of a cake or loaf is browning too fast while the center is still raw, tent it loosely with aluminum foil. The foil reflects heat away from the surface while the interior catches up.
Before you change any recipe variable, check two things first: oven thermometer reading and leavener freshness. These two factors account for the majority of baking failures.
How to store and freeze doughs and finished bakes
Most doughs freeze well and actually benefit from it. Cookie dough can be portioned into balls, frozen on a sheet pan, then transferred to a zip-top bag. Bake straight from frozen, adding 2–3 minutes to the bake time. Pie dough freezes flat in a disk, wrapped tightly in plastic wrap, for up to 3 months. Bread dough can be frozen after the first rise; thaw overnight in the refrigerator and let it complete its second rise at room temperature.
For finished bakes, the rules depend on the item:
- Cookies: Store in an airtight container at room temperature for up to 5 days. To refresh stale cookies, place them in a 300°F oven for 5 minutes.
- Cakes (unfrosted): Wrap tightly in plastic wrap and store at room temperature for 2–3 days, or freeze for up to 3 months. Frosted cakes keep in the refrigerator for 3–4 days.
- Bread: Store at room temperature in a paper bag or bread box for 2–3 days. Refrigeration dries bread out faster. Slice and freeze for longer storage; toast directly from frozen.
- Pies: Fruit pies keep at room temperature for 2 days or refrigerated for 4–5 days. Custard pies must be refrigerated.
Always label frozen items with the date and contents. A marker and a piece of masking tape takes five seconds and saves you from mystery freezer items three months later.
Quick rules by recipe type: cakes, cookies, bread, and pies
Cakes
- Grease and flour pans, or use parchment circles cut to fit. Skipping this step is the most common reason cakes stick.
- Check doneness with a toothpick inserted in the center: it should come out clean or with a few moist crumbs, not wet batter. For denser cakes, an instant-read thermometer reading of 200–210°F is more reliable.
- Cool in the pan for 10–15 minutes, then turn out onto a wire rack. Cutting or frosting a warm cake causes it to fall apart and melts frosting.
Cookies
- Chill your dough. Even 30 minutes in the refrigerator firms the fat and controls spread.
- Space cookies at least 2 inches apart on the sheet. They spread.
- Bake one sheet at a time on the center rack for even results. If you must bake two sheets, rotate and swap racks halfway through.
Bread
- Hydration is everything. A shaggy, slightly sticky dough produces a more open crumb than a stiff one. Resist adding extra flour.
- Proof until the dough has roughly doubled and a poked finger indent springs back slowly. Under-proofed bread is dense; over-proofed bread collapses.
- Score the surface with a sharp knife or lame just before baking. Scoring controls where the bread expands and prevents random blowouts. For a better crust, add steam: place a pan of hot water on the oven floor for the first 10 minutes. For more on proofing and scoring, the bread baking guide at Kitchendevotion goes deeper.
Pies and tarts
- Blind-bake single-crust pies before adding wet fillings. Line the raw crust with parchment, fill with pie weights or dried beans, and bake at 375°F for 15–20 minutes, then remove the weights and bake another 5–10 minutes until the base is set.
- Dock the crust (prick it all over with a fork) before blind-baking to prevent bubbling.
- Bake pies on the lower rack for a crisp bottom. A dark metal or ceramic pan conducts heat better than a glass one for this purpose.
Key Takeaways
Weighing ingredients, verifying oven temperature, and testing leaveners before you bake resolve the vast majority of home-baking failures faster than any technique change.
| Point | Details |
|---|---|
| Weigh ingredients | A cup of flour varies in weight by volume; a scale eliminates this variance. |
| Calibrate your oven | Most home ovens run several degrees off; an oven thermometer is the fastest fix. |
| Respect ingredient temperature | Butter for creaming should be at the right softened temperature; cold eggs and dairy break emulsions. |
| Test leaveners first | Drop baking powder in hot water or proof yeast before mixing to avoid flat results. |
| Kitchendevotion tool guides | Kitchendevotion’s baking tools resources help you find the right scale, thermometer, and prep gear. |
The pre-bake checklist that actually works
Most baking failures are preventable. The ones that aren’t usually come down to skipping a step you already knew mattered. A short checklist before every session closes that gap.
Here’s the one worth keeping:
- Scale on and zeroed. Weigh every ingredient; don’t eyeball anything.
- Oven thermometer checked. Know your oven’s actual temperature before you set it.
- Mise en place complete. Every ingredient measured, prepped, and at the right temperature.
- Oven preheating. At least 20 minutes before the bake goes in.
- Pans lined or greased. Done before the batter is ready, not after.
- Timer set. Check at the minimum bake time listed in the recipe.
One habit that compounds over time: keep a simple baking log. Write down the date, the recipe, the oven temperature you actually used, the flour brand, and any changes you made. When something works, you’ll know exactly why. When it doesn’t, you’ll have something to troubleshoot against.
The right gear makes every baking tip stick
Good technique only goes so far when your tools are fighting you. A warped sheet pan conducts heat unevenly. A scale that drifts throws off every measurement. A pan that sticks wastes a bake you spent an hour on.

Kitchendevotion curates cookware sets and baking gear chosen for real home kitchen use, not professional kitchens with unlimited budgets. The focus is on tools that perform consistently: pans that conduct heat evenly, prep tools that hold up, and picks that fit a home baker’s actual workflow. If you’re building out your setup or replacing gear that’s been letting you down, the budget-friendly picks under $50 are a good starting point. Scales, oven thermometers, and prep essentials are all covered. Browse the full kitchen tools checklist to see what fits your kitchen.
Useful sources and further reading
These are the references that back the techniques in this article, organized by what each one covers best:
- Escoffier: Baking Basics for Beginners — Covers foundational techniques including mise en place, creaming, folding, and kneading with professional context.
- Business Insider: Biggest Mistakes Home Bakers Make — Professional pastry chef perspective on measurement variance and oven discipline.
- The Practical Kitchen: Baking Techniques and Troubleshooting — Practical oven-mapping and consistency strategies for home bakers.
- Krusteaz: How to Fix Common Baking Mistakes — Symptom-by-symptom troubleshooting guide with mid-bake and post-bake fixes.
- Maplewood Road: Common Baking Fixes — Quick leavener tests and practical fixes for frequent home-baking problems.
- Desserts.top: Baking Science and Ingredient Interactions — Explains ingredient roles and how understanding chemistry improves troubleshooting.
- Sort of Baking: Essential Home Baking Guide — Beginner-focused guide covering mixing methods, temperature, and visual cues.
- National Culinary Authority: Baking and Pastry Techniques — Covers temperature windows for laminated doughs and professional pastry foundations.
FAQ
What is the 1-2-3-4 rule in baking?
The 1-2-3-4 cake is a classic ratio recipe: 1 cup butter, 2 cups sugar, 3 cups flour, and 4 eggs, plus leavener and milk. It’s a useful starting framework for understanding how ingredient ratios affect structure and texture.
What are the five rules for successful baking?
Measure by weight, verify oven temperature, use room-temperature ingredients, follow the recipe’s mixing method, and test leaveners before you start. These five practices address the most common causes of baking failure.
What is the most common mistake in baking?
Overmixing and inaccurate flour measurement are the two most frequent culprits. Measuring flour by volume can introduce a 20–25% variance in weight, and overmixing develops excess gluten that toughens the final texture.
How do I know if my baking powder is still good?
Drop 1 teaspoon into ½ cup of hot water. If it bubbles vigorously, it’s active. If the reaction is weak or absent, replace it before baking.
Why do my cakes sink in the middle?
The most likely causes are opening the oven door too early (which can drop oven temperature by 25–50°F), underbaking, or using too much leavener. Check your oven thermometer, and keep the door closed until the minimum bake time.





No comment