
Good knife skills come down to three things: the right tool, the right grip, and a safe guiding hand. Specifically, an 8-inch chef’s knife + pinch grip + claw hand is the highest-impact combination for most home cooking. Everything else builds from there.
The short version:
- Essential cuts to learn first: slice, dice (large/medium/small), and mince
- Safety habit: claw grip on your guiding hand, damp towel under the board
- Maintenance: hone your blade often, sharpen only when honing stops working
One thing to do right now: Pick up any knife and practice the pinch grip by pinching the blade between your thumb and the side of your index finger near the bolster. That single adjustment will change how every cut feels.
Table of Contents
- Which knives and cutting boards do most home cooks actually need?
- How do you hold a knife correctly?
- What are the basic knife cuts every home cook should know?
- What are the most important knife safety habits?
- How often should you hone and sharpen your knives?
- How do you build knife skills through practice?
- What mistakes do beginner home cooks make most often?
- Key Takeaways
- The part most guides get wrong about knife practice
- Useful resources to go deeper
- FAQ
Which knives and cutting boards do most home cooks actually need?
The 8-inch chef’s knife handles the vast majority of home kitchen tasks. Its curved blade supports a rocking motion for chopping and mincing, and its length gives you enough reach for larger items like melons or squash without feeling unwieldy. America’s Test Kitchen recommends it specifically because it balances maneuverability with reach.
Beyond that, three knives cover nearly every task a home cook encounters:
| Knife | Blade Length | Best For |
|---|---|---|
| Chef’s knife | 8 inches (20 cm) | Chopping, dicing, slicing, mincing |
| Paring knife | 3–4 inches | Peeling, trimming, detail work |
| Serrated/bread knife | 8–10 inches | Bread, tomatoes, delicate pastries |
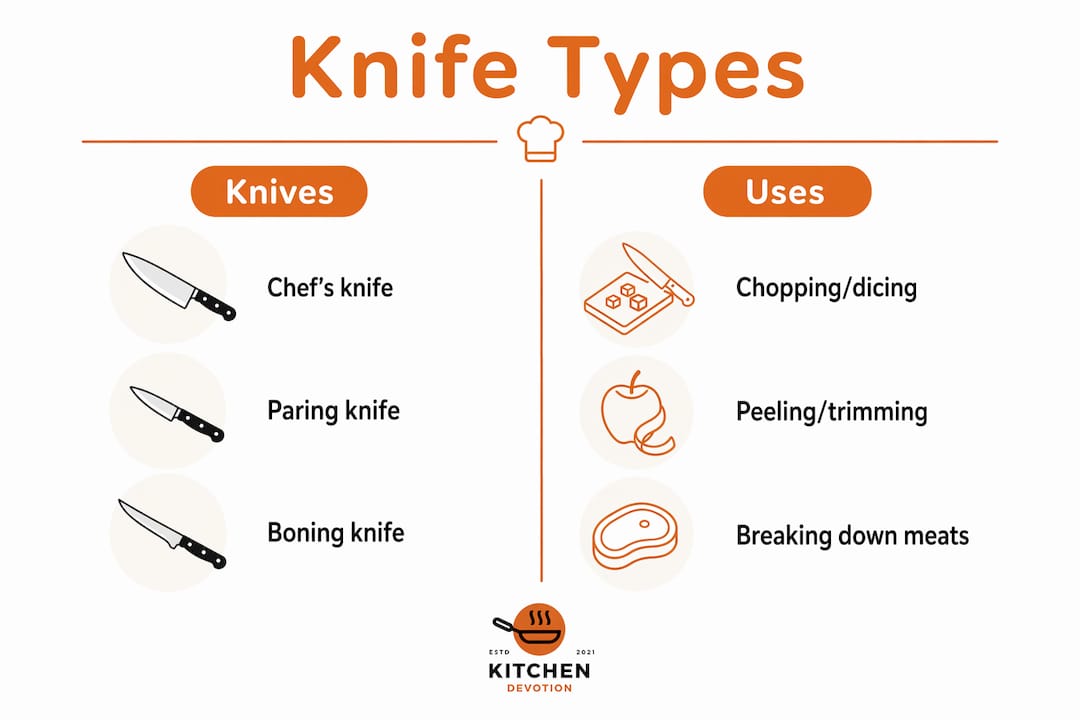
A boning knife is worth adding only if you regularly break down whole chickens or trim roasts. Skip it until you need it.
For cutting boards, wood and plastic each have trade-offs. Wood is gentler on blade edges and more durable long-term; plastic is easier to sanitize and dishwasher-safe. Either works well. What matters more: the board should be large enough that food doesn’t hang off the edge, and it must stay put. A damp paper towel or cloth under the board solves the sliding problem immediately.
Pro Tip: If you’re buying your first knife set on a budget, start with just the chef’s knife and a paring knife. Check Kitchendevotion’s best kitchen prep tools for beginners for affordable options under $50 that won’t compromise your practice.
Store knives on a magnetic strip or in a knife block. Loose knives rattling in a drawer dull the edges and are genuinely dangerous to reach into.
How do you hold a knife correctly?
The pinch grip gives you more control and precision than a handle-only grip, and it’s recommended by Consumer Reports for exactly that reason. Most beginners hold the handle with all four fingers, which leaves the blade loose and harder to steer.
To form the pinch grip:
- Hold the knife loosely in your dominant hand.
- Slide your index finger and thumb forward onto the blade itself, just ahead of the bolster.
- Pinch the blade firmly between the flat side of your index finger and the pad of your thumb.
- Wrap your remaining three fingers around the handle.
- The blade should feel like an extension of your forearm, not a separate object you’re gripping.
For your guiding hand (the claw):
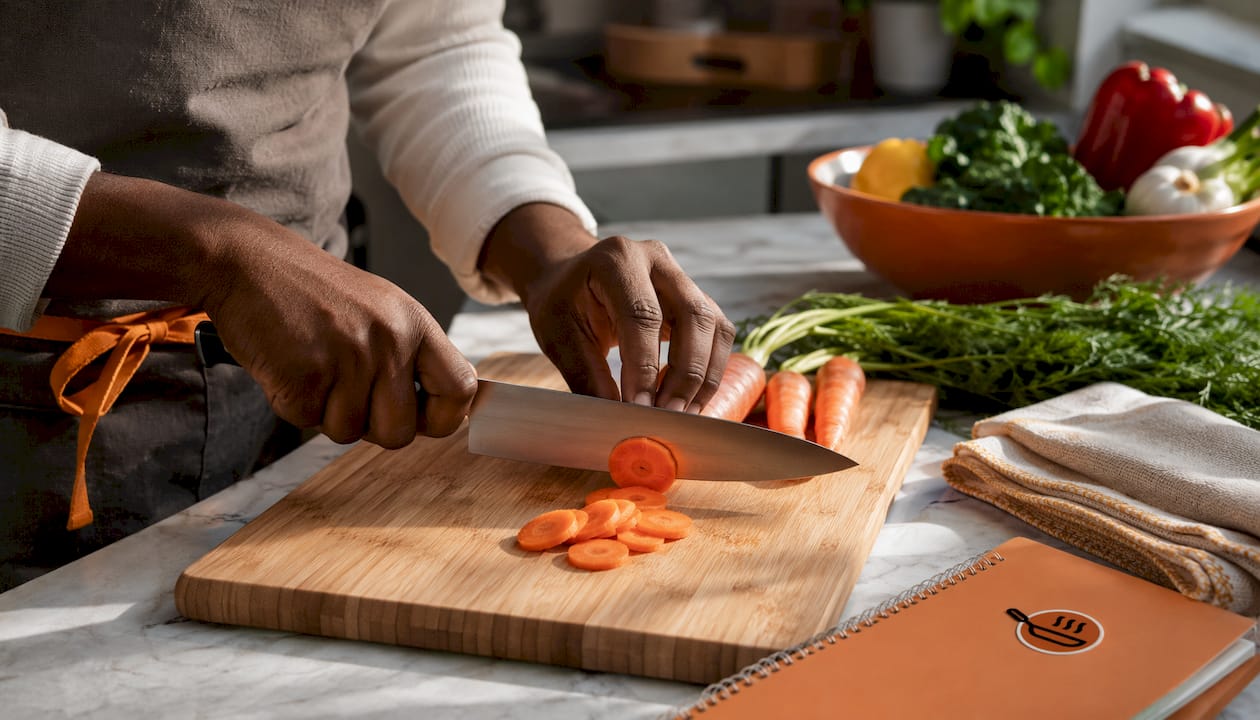
- Place your fingertips on the food, curling them inward so your knuckles face the blade.
- Keep the flat of the blade lightly touching your knuckles as you cut.
- Slide your hand backward with each slice, letting your knuckles guide the cut width.
Consumer Reports notes that the pinch grip feels awkward at first for many home cooks. That’s normal. Short, deliberate practice sessions fix it faster than trying to power through at full speed.
Pro Tip: Practice the claw grip on a carrot before you try anything else. Carrots are firm, forgiving, and give you immediate feedback on whether your knuckles are actually guiding the blade.
What are the basic knife cuts every home cook should know?
These eight cuts cover most recipes you’ll encounter at home. The key is hitting consistent target sizes, because uniform cuts cook at the same rate and produce better texture and flavor absorption.
| Cut | Target Size | Common Uses |
|---|---|---|
| Slice | Even thickness, any width | Carrots, cucumbers, mushrooms |
| Large dice | ¾ inch (2 cm) cubes | Stews, roasted vegetables |
| Medium dice | ½ inch cubes | Soups, sautés, home fries |
| Small dice | ¼ inch (6 mm) cubes | Salsas, stuffings, fine sauces |
| Batonnet | ¼ × ¼ × 2–3 inches | Stir-fries, crudités |
| Julienne | ⅛ × ⅛ × 2–3 inches | Garnishes, quick-cook stir-fries |
| Brunoise | ⅛ inch (3 mm) cubes | Fine garnishes, compound butters |
| Mince | Smaller than ⅛ inch (3 mm) | Garlic, herbs, aromatics |
For a basic dice:
- Trim the ends and create a flat base (slice one side off round produce).
- Cut into planks matching your target thickness.
- Stack the planks and cut into sticks (batonnet width).
- Rotate 90° and cut across the sticks into cubes.
For mince:
- Rough-chop the ingredient into a loose pile.
- Place your non-cutting hand flat on the spine of the blade near the tip.
- Rock the heel up and down while pivoting the tip, sweeping the pile back together between passes.
- Repeat until pieces are smaller than ⅛ inch (3 mm).
Uniform cuts matter beyond aesthetics. Unevenly cut vegetables mean some pieces are mushy while others are still raw. That’s the difference between a good dish and a great one.
What are the most important knife safety habits?
Stable surface, claw hand, and full attention are the three controls that prevent most kitchen knife injuries. Everything else is secondary.
Do:
- Place a damp towel under your cutting board before you start.
- Use the claw grip every time, even on easy cuts.
- Carry a knife with the tip pointed down and the blade facing away from your body.
- Store knives in a knife block or on a magnetic strip to protect edges and fingers.
- Hand-wash knives and dry them immediately. The dishwasher’s heat and jostling damages handles and dulls edges.
Don’t:
- Cut toward yourself, ever.
- Catch a falling knife. Step back and let it drop.
- Leave knives loose in a drawer.
- Use a wet or greasy handle without drying it first.
For a broader look at kitchen safety practices, including cut-resistant gloves and safe storage setups, Kitchendevotion has a dedicated guide worth bookmarking.
How often should you hone and sharpen your knives?
Hone frequently. Sharpen only when honing no longer restores the edge. Those are two different actions, and mixing them up is one of the most common maintenance mistakes home cooks make.
A honing steel realigns the microscopic teeth on the blade’s edge without removing metal. A whetstone or electric sharpener actually grinds away metal to create a new edge. As America’s Test Kitchen explains, a dull blade requires more force to push through food, which increases the chance of slipping. A sharp knife is a safer knife.
Basic honing routine:
- Hold the honing steel vertically, tip resting on a folded towel on the counter.
- Place the heel of the blade at the top of the steel at roughly a 15–20° angle.
- Draw the blade downward and toward you in a smooth arc, heel to tip.
- Alternate sides, 4–6 strokes per side.
- Do this before each cooking session, or at minimum a few times per week.
For sharpening, a whetstone gives the most control (start with a 1000-grit stone, finish with 3000–6000 grit). An electric sharpener is faster and easier for most home cooks. When a knife is badly damaged or you’re unsure, a professional sharpening service is worth the cost, typically a few dollars per knife.
Small paring knives are often difficult to sharpen at home with consistent results. If an inexpensive paring knife has gone truly dull, replacing it is often more practical than repeated at-home attempts.
How do you build knife skills through practice?
Consistency before speed is the single most important principle here. Trying to go fast before your technique is solid just reinforces bad habits.
Pro Tip: Set up your practice station with a stable board, a sharp knife, and cheap ingredients. Carrots and onions are ideal: firm, inexpensive, and they give you instant feedback on cut uniformity.
Two-week progression (10–15 minutes daily):
- Days 1–3: Basic slices on carrots. Focus entirely on even thickness, not speed. Target: 20 uniform rounds in 3 minutes.
- Days 4–7: Medium dice on onions. Practice the horizontal and vertical cuts before the final cross-cuts. Target: 30 even cubes in 5 minutes.
- Days 8–11: Mince garlic and parsley using the rocking motion. Target: a fine, even mince in under 2 minutes.
- Days 12–14: Combine all three in a single prep session. Make a simple soup or stir-fry using every cut you’ve practiced.
Speed follows naturally once your hands know the motion. Rushing it early just means uneven cuts and a higher chance of slipping.
What mistakes do beginner home cooks make most often?
Most problems trace back to three causes: a dull blade, a poor grip, or an unstable work surface. Fix those first before assuming your technique is wrong.
Common problems and quick fixes:
- Produce rolls while cutting: Slice a thin flat base off one side first. A flat base prevents rolling and keeps the ingredient stable for every cut that follows.
- Uneven dice: Slow down and check that your planks are even before stacking. Use your knuckle as a consistent width guide.
- Blade slipping on food: Dry the blade and your handle. Then check sharpness with the paper test: a sharp knife slices through a sheet of paper cleanly; a dull one tears.
- Hand fatigue after a few minutes: Your grip is probably too tight. The pinch grip works with light pressure, not a white-knuckle clench.
- Herbs bruising instead of cutting: The blade is dull, or you’re pressing down instead of slicing. Let the edge do the work.
Before you start any prep session, run three quick checks: Is the board stable? Is the knife sharp enough to slice paper? Are your hands dry? Those 10 seconds prevent most accidents.
Key Takeaways
The single most effective habit for home cooks is pairing an 8-inch chef’s knife with the pinch grip and claw hand, then practicing basic cuts for 10–15 minutes daily until consistency becomes automatic.
| Point | Details |
|---|---|
| Primary tool | An 8-inch chef’s knife handles most home cooking tasks with the best balance of control and reach. |
| Grip first | The pinch grip gives more control and precision than a handle-only grip; practice it before worrying about speed. |
| Three cuts to master | Slice, medium dice, and mince cover the majority of everyday recipes. |
| Safety non-negotiables | Claw grip, damp towel under the board, and hand-washing knives immediately after use. |
| Maintenance habit | Hone before each session; sharpen only when honing stops restoring the edge. |
The part most guides get wrong about knife practice
Most knife skills content focuses on technique steps, which is useful, but misses the bigger obstacle: home cooks practice in the wrong order. They watch a video, try to dice an onion fast on their first attempt, produce uneven chunks, and conclude they’re just not good at this.
The actual sequence that works is slower and less exciting. You practice the pinch grip on a dry towel before you touch food. You make 20 uniform carrot slices before you attempt a dice. You mince a single clove of garlic with full attention before you try to prep a whole meal. Muscle memory builds in layers, and trying to skip layers just means rebuilding bad habits later.
There’s also a tool problem worth naming. A dull knife makes every technique harder to execute correctly. If your knife requires real force to push through a carrot, no amount of grip adjustment will fix the experience. Honing before you practice isn’t optional maintenance; it’s what makes the practice session actually work. Kitchendevotion’s curated knife and prep tool guides are worth checking before you invest in a set, because starting with a well-balanced knife removes one major variable from the learning curve.
Speed will come. It always does. But it comes from repetition of correct technique, not from trying to move faster before the technique is solid.
Useful resources to go deeper
- How to Use and Care for a Chef’s Knife (Consumer Reports): covers pinch grip, claw hand, and basic care with clear photos. The primary source for grip and maintenance claims in this guide.
- A Guide to Using Your Chef’s Knife (America’s Test Kitchen): strong on honing vs. sharpening and knife selection rationale.
- Basic Knife Skills (NYT Cooking): practical video demonstrations for slice, dice, and mince; especially useful for visual learners.
- Six Basic Knife Techniques Everyone Should Know (Lifehacker): quick reference for flat-base technique and common cuts.
- Kitchendevotion’s knife storage guide and kitchen safety tips: practical storage options and safety habits for home kitchens.
- For readers building out a full prep setup, Kitchendevotion’s meal prep station guide pairs well with the practice drills above.
FAQ
What is the best knife for a beginner home cook?
An 8-inch chef’s knife is the best starting point. It handles chopping, dicing, slicing, and mincing, and its curved blade supports the rocking motion used in most basic cuts.
How long does it take to learn the pinch grip?
Most home cooks feel comfortable with the pinch grip after a few short practice sessions. Consumer Reports notes it may feel awkward at first, but consistency over a few days builds both speed and control.
How often should you sharpen a kitchen knife?
Hone your knife before each cooking session to realign the edge. Full sharpening is needed far less often, typically a few times per year for a regularly used home knife, or whenever honing no longer restores a clean edge.
Why do uniform cuts matter?
Uniform cuts mean all pieces are the same size, so they cook at the same rate. Unevenly cut vegetables produce a mix of overcooked and undercooked pieces in the same pan.
Is a sharp knife really safer than a dull one?
Yes. A dull knife requires more force to push through food, which increases the chance of the blade slipping. A sharp knife cuts with light pressure and stays on course.




No comment