Pressure cooker recipes are the fastest path from raw ingredients to a full, nutritious dinner on the table. A pressure cooker cuts cooking time by 60%–75%, turning a 90-minute braise into a 25-minute weeknight meal. The sealed environment also retains more water-soluble vitamins than boiling or slow simmering, making these meals genuinely healthier, not just faster. For busy families who need real food without a two-hour commitment, mastering a handful of pressure cooker techniques changes everything about how dinner gets done.
How do pressure cookers work so much faster?
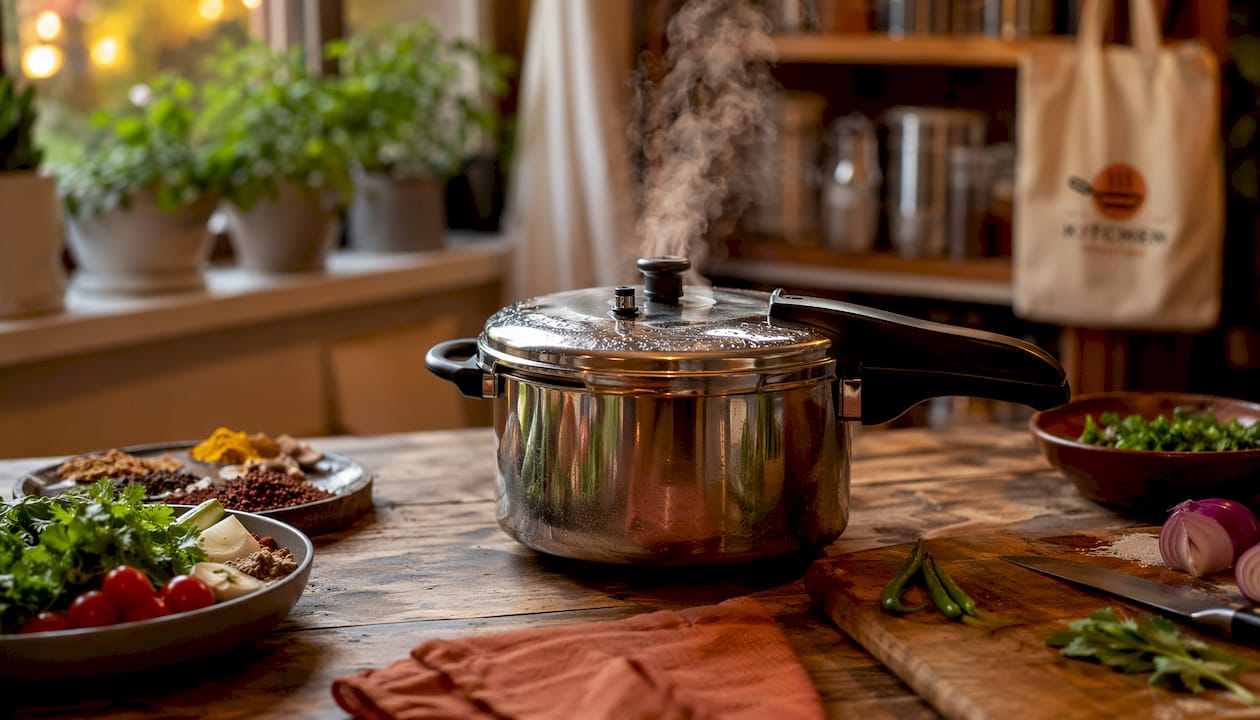
A pressure cooker raises the boiling point of water from 212°F to roughly 250°F by trapping steam inside a sealed pot. That higher temperature drives chemical reactions faster, which is why collagen in tough meat breaks down in 30 minutes instead of three hours.
The science behind the flavor is just as interesting. Volatile aromatics stay locked in the pot rather than escaping as steam the way they do in open cooking. That is why a pressure cooker beef stew tastes richer and deeper than one made on the stovetop in the same amount of time.
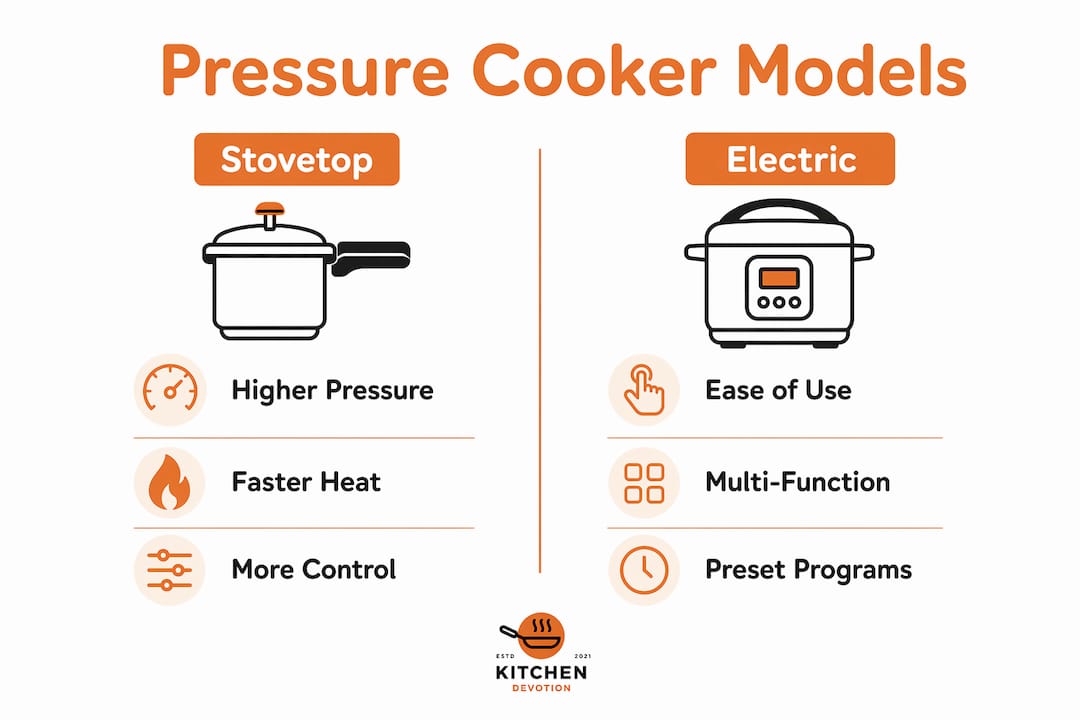
Stovetop vs. electric models
Stovetop pressure cookers reach higher pressures and give you more control over heat. They heat up faster and work well for experienced cooks who want precision. Electric models, often called multi-cookers, are better for beginners because they regulate pressure automatically and include built-in timers. Both types use the same core physics. The choice comes down to how much hands-on attention you want to give.
Collagen-rich cuts like chuck roast and pork shoulder benefit most from the high-heat, high-pressure environment. The collagen breaks down into gelatin, which thickens the cooking liquid and gives the meat a silky, pull-apart texture. That transformation happens at 250°F under pressure in a fraction of the time it takes in a conventional oven.
Pro Tip: Fill your pressure cooker with at least one cup of liquid before sealing. Without enough liquid, the pot cannot generate steam, and the pressure will never build correctly.
At higher altitudes, atmospheric pressure drops, which normally lowers the boiling point of water and makes cooking slower. A pressure cooker offsets lower atmospheric pressure by maintaining temperatures close to sea-level boiling points, which is a real advantage for families cooking above 3,000 feet.
What are the best ingredients for pressure cooker cooking?
Not every ingredient belongs inside a sealed pressure cooker. Knowing which foods thrive under pressure and which ones turn to mush is the single most useful piece of knowledge for getting great results consistently.
Foods that perform best under pressure:
- Collagen-rich meats: Chuck roast, pork shoulder, short ribs, oxtail, and lamb shanks all become tender and flavorful. The collagen-to-gelatin conversion that takes hours in a slow cooker happens in 30–45 minutes under pressure.
- Dry beans and legumes: Black beans, chickpeas, and lentils cook from dry in 20–40 minutes without soaking. This makes budget-friendly pressure cooker recipes genuinely practical on a weeknight.
- Hearty grains: Brown rice, farro, and barley cook evenly and quickly. Brown rice that takes 45 minutes on the stovetop is done in 22 minutes under pressure.
- Root vegetables: Potatoes, carrots, parsnips, and beets hold their structure well and absorb cooking liquid beautifully.
- Soups and stews: One-pot pressure cooker soup recipes like chicken noodle, lentil soup, and beef stew are the most forgiving dishes to start with.
Foods to add after pressure cooking:
- Delicate fish and shellfish overcook in seconds under pressure. Add them after releasing pressure and let residual heat finish the job.
- Fresh leafy greens like spinach and kale turn gray and mushy. Stir them in after cooking.
- Dairy products, including cream, sour cream, and cheese, can curdle under high heat. Add them at the end.
- Quick-cooking vegetables like zucchini and peas lose all texture. Add them during the last few minutes using the sauté function.
The most reliable easy pressure cooker meals follow a simple pattern: a tough protein, aromatics, liquid, and a starch or legume all go in together. Everything else gets added after the lid comes off.
Pro Tip: Rinse dry beans thoroughly before adding them to the pot. Bean foam is the leading cause of valve blockage in pressure cookers, and rinsing reduces foam significantly.
How do you prepare easy pressure cooker meals step by step?
A reliable workflow removes the guesswork and makes every session faster. Follow these steps for consistent results with any pressure cooker dinner idea.
- Prep your ingredients before sealing the lid. Chop vegetables, measure liquids, and pat proteins dry. Once the lid is locked, you cannot add anything without releasing pressure first.
- Layer ingredients correctly. Place proteins and dense vegetables at the bottom, closest to the heat source. Add liquid next. Put grains or beans on top, but do not stir. Stirring can cause sticking and uneven cooking.
- Never fill past the two-thirds line. Keep at least one-third of the pot empty to allow safe steam expansion. For foods that foam, like beans and grains, fill no more than halfway.
- Lock the lid and set your pressure level. Most recipes use high pressure. Low pressure works for delicate foods like eggs or fish when you do cook them under pressure.
- Choose your release method based on the recipe. This is where most beginners make mistakes.
- Open the lid away from your face. Steam exits fast and is extremely hot. Tilt the lid so steam vents away from you.
- Taste and adjust seasoning. Pressure cooking concentrates flavors, so go lighter on salt before cooking and adjust at the end.
Natural release vs. quick release
Natural release means you turn off the heat and let pressure drop on its own over 10–20 minutes. Use this method for large cuts of meat, beans, and soups. Quick release should not be used for high-liquid recipes like broths and soups because the rapid pressure drop can cause hot liquid to spatter through the valve and cause burns.
Quick release is the right choice for vegetables, grains, and anything where you want to stop cooking immediately to preserve texture. You manually open the steam valve and pressure drops in under two minutes.
The most common pressure cooker mistake is not a safety issue. It is a flavor issue. Skipping the sauté step before sealing the lid means missing the browning reaction that builds the base flavor of the dish. Always brown your meat and aromatics first using the sauté function or a separate pan. That five-minute step is the difference between a flat-tasting stew and one that tastes like it cooked all day.
Pro Tip: After cooking, wipe the sealing ring and check the steam valve for debris after every use. A clogged valve is the most common cause of pressure build-up problems, and it takes 30 seconds to prevent.
Cleaning and maintenance
Remove and wash the sealing ring after every use. It absorbs odors and can affect the flavor of future meals if left dirty. Check the steam release valve for food particles each time. Most inner pots are dishwasher safe, but hand washing extends their life. Store the lid upside down on the pot rather than sealed, which prevents odor buildup between uses.
Why do busy families save so much time with a pressure cooker?
A pressure cooker does not just cook faster. It changes the entire structure of a weeknight kitchen. Busy families save up to 30 minutes daily using one-pot pressure cooker workflows, and that time adds up to more than three hours per week.
The appliance consolidation benefit is real. A pressure cooker replaces a rice cooker, slow cooker, and steamer in a single device. That means less counter clutter, fewer appliances to maintain, and one pot to wash instead of three. For families working with limited kitchen space, this matters.
| Cooking method | Typical time for beef stew | Cleanup items | Nutrient retention |
|---|---|---|---|
| Stovetop braising | 2.5–3 hours | 2–3 pots and pans | Moderate |
| Slow cooker | 6–8 hours | 1 pot | Moderate |
| Oven roasting | 2–2.5 hours | 1 roasting pan | Moderate |
| Pressure cooker | 35–45 minutes | 1 pot | High |
One-pot meals also keep the kitchen cooler in summer. A sealed pressure cooker contains heat rather than radiating it into the room the way a stovetop or oven does. For families cooking in warm climates or during summer months, that is a practical comfort benefit most people do not think about until they experience it.
The time-saving kitchen appliances that make the biggest difference in daily life are the ones that replace multiple steps, not just one. A pressure cooker fits that description better than almost any other single appliance. Pair it with solid kitchen workflow habits and weeknight cooking becomes genuinely manageable.
My honest take on pressure cooking for weeknight meals
When I first started using a pressure cooker, the lid made me nervous. The hissing, the locked handle, the steam. It felt like something that required training. That feeling lasted about two weeks.
Modern electric pressure cookers have multiple safety features that prevent the hazards people associate with older stovetop models. Locking lids, float valves, and automatic pressure regulators make accidental over-pressurization nearly impossible. The fear is understandable, but it is based on equipment that most people have not used in decades.
The recipe that converted me completely was a simple chicken and white bean stew. Browned chicken thighs, canned tomatoes, dry white beans, garlic, and chicken broth. Sealed for 28 minutes on high pressure. Natural release for 10 minutes. The beans were creamy, the chicken fell apart, and the broth tasted like it had been simmering since noon. It had been cooking for less than 40 minutes total.
My advice for anyone building confidence with this appliance: start with soups and stews. They are forgiving, they benefit most from pressure cooking, and the results are dramatic enough to make you want to cook this way every week. Once you have done three or four soups, move to braised meats. After that, dry beans from scratch. Each step builds on the last, and none of them require any special skill.
The families I have seen struggle with pressure cooking share one habit: they try to adapt delicate recipes before they understand the basics. Start with the foods that are almost impossible to ruin under pressure. Build from there.
— K. Connors
Kitchendevotion’s picks for pressure cooker-friendly kitchens
Pressure cooking works best when the rest of your kitchen keeps up with it. A meal that takes 35 minutes under pressure should not take another 30 minutes to plate because your prep tools or storage are slowing you down.

Kitchendevotion has put together a kitchen appliance priority list that helps home cooks identify which tools deliver the most value for their cooking style. For families focused on fast, nutritious meals, the multi-purpose appliance guide covers exactly how to choose devices that do more than one job well. Both resources are built for cooks who want a kitchen that works as hard as they do, without buying things they will never use.
Key takeaways
Pressure cooker recipes cut cooking time by up to 75% while retaining more nutrients than boiling, making them the most efficient cooking method for busy families who want real, flavorful meals on a weeknight schedule.
| Point | Details |
|---|---|
| Speed advantage | Pressure cooking reduces cook time by 60%–75%, turning long braises into 30-minute meals. |
| Best ingredients | Collagen-rich meats, dry beans, hearty grains, and root vegetables perform best under pressure. |
| Release method matters | Use natural release for soups and large cuts; use quick release for vegetables and grains. |
| Safety is built in | Modern electric models include locking lids and float valves that prevent over-pressurization. |
| One-pot efficiency | A pressure cooker replaces a rice cooker, slow cooker, and steamer, cutting cleanup and clutter. |
FAQ
How much faster is a pressure cooker than a regular pot?
Pressure cooking reduces cooking time by 60%–75% compared to conventional methods. A dish that takes 90 minutes on the stovetop is typically done in under 30 minutes under pressure.
Is pressure cooking actually healthier?
Pressure cooking retains more water-soluble vitamins and minerals than boiling because it uses less water and cooks for a shorter time. The sealed environment prevents nutrient loss through evaporation.
How full can I fill a pressure cooker?
Keep at least one-third of the pot empty to allow safe steam expansion. For beans and grains that produce foam, fill no more than halfway.
When should I use natural release vs. quick release?
Use natural release for soups, broths, and large cuts of meat. Quick release causes splattering in high-liquid recipes and can cause burns, so reserve it for vegetables and grains.
Can a pressure cooker replace a slow cooker?
A pressure cooker produces similar results to a slow cooker in a fraction of the time. It also functions as a rice cooker and steamer, making it a practical replacement for multiple single-purpose appliances.




No comment