The fix for stainless pan sticking is one repeatable routine: preheat the empty pan for 2 to 3 minutes on medium, run the water-drop test, add a thin film of high-smoke-point oil, pat your food dry, then wait for natural release before touching it. That sequence builds a vapor and oil barrier over the metal’s microscopic pores, which is what stops proteins from bonding to the surface in the first place.
TL;DR:
- Preheat the pan for 2 to 3 minutes on medium to ensure even heating and prevent hot spots that cause sticking.
- Use the water-drop test to confirm the pan has reached the Leidenfrost point before adding oil, reducing the likelihood of food bonding.
- Pat food dry and let it sit at room temperature for 10 to 15 minutes to minimize surface moisture that can lead to sticking.
- Always add oil only after the pan is hot enough to shimmer, using high-smoke-point oils for searing to avoid burning and residue.
- Use proper utensils, avoid crowding the pan, and wait for natural release to prevent tearing crusts and sticking during cooking.
Table of Contents
- How Do You Stop Stainless Steel Pans From Sticking?
- Getting the Timing Right: Preheat, Oil, and When to Flip
- Why Stainless Steel Makes Food Stick in the First Place
- Why Is My Food Still Sticking? Quick Fixes for Common Problems
- How to Clean Stuck-On and Burnt Stainless Steel Pans
- Kitchen Devotion’s Take on Getting Stainless Steel Right
- Does Pan Quality Actually Matter for Sticking?
- Can You Season a Stainless Steel Pan?
- Which Utensils Protect Your Pan’s Release Ability?
- What Mistakes Cause Most of the Sticking You’re Fighting?
- When Should You Reach for Stainless Steel, and When Should You Grab Something Else?
- Ready to Upgrade Your Cookware Lineup?
- Sources
- FAQ
How Do You Stop Stainless Steel Pans From Sticking?
Run through these steps in order, every time, and most sticking problems disappear before they start.
- Preheat the dry pan for 2 to 3 minutes on medium heat. Skip the burner blast. Uniform, gradual heat matters more than raw temperature.
- Run the water-drop test. Flick in a few drops of water. If they vanish instantly, the pan isn’t hot enough yet. If they hiss and evaporate fast, you’re close. If a single bead forms and skitters across the surface, the pan has hit its readiness point.
- Add oil to the hot pan, not before. A thin, even film is enough. Wait until it shimmers, not smokes.
- Pat your protein or vegetables dry and let them sit for 10 to 15 minutes to lose that cold-from-the-fridge edge.
- Add the food and leave it alone. Don’t crowd the pan. Wait for natural release instead of forcing a flip.
- If something’s clinging slightly, drop the heat a notch and give it another 30 seconds. If it’s already burnt on, jump to the cleaning method later in this article.
Getting the Timing Right: Preheat, Oil, and When to Flip
Most sticking disasters trace back to one thing: impatience. Cooks crank the burner to high, dump oil into a cold pan, and start cooking within 90 seconds. According to the water-test guidance from Chowhound, letting a pan preheat fully eliminates most sticking problems outright. The fix costs you nothing but two extra minutes.
Why medium heat beats high heat
Blasting a burner to high for 30 seconds feels efficient, but it heats the pan unevenly. Stainless steel needs time to expand at a consistent rate across its surface, which effectively tightens the microscopic pores where food likes to grab hold. Two to three minutes on medium or medium-low lets that happen evenly. High heat for a short burst leaves hot spots and cool spots side by side, and food sticks precisely where the metal hasn’t caught up yet.
Reading the water-drop test correctly
The water-drop test isn’t just a kitchen trick, it’s a direct readout of the Leidenfrost effect, the same physics that makes a drop of water bead up and skate across a hot griddle instead of soaking in. Water hits its film-boiling point around 379°F. Below that, droplets sizzle and disappear almost immediately. Once the pan crosses that threshold, a droplet forms a vapor cushion underneath itself and slides around instead of evaporating on contact. That skittering bead is your cue: the pan is ready for oil.
- Water vanishes instantly with no sound: pan is still cool, wait longer.
- Water sizzles and boils off in under a second: getting close, give it another 30 to 60 seconds.
- A single bead forms and slides or dances across the surface: the pan has hit the Leidenfrost point and you’re ready to add fat.
Hot pan, cold fat, and picking the right oil
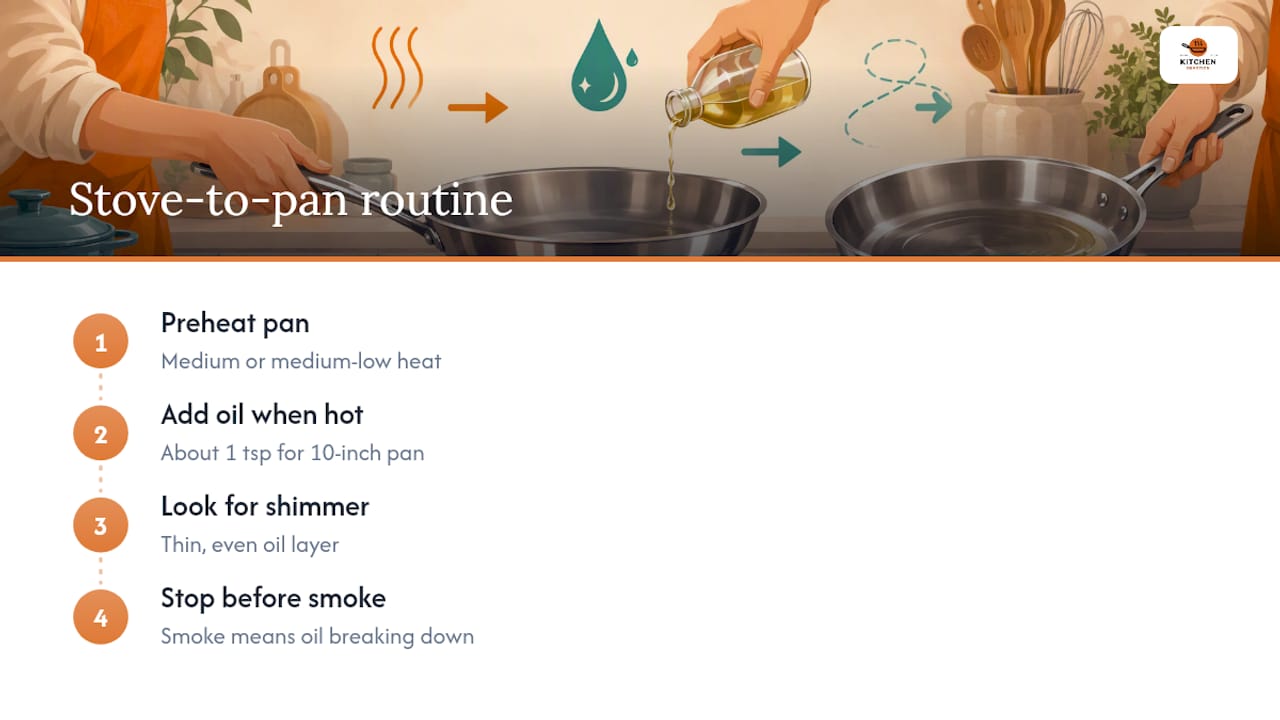
Add oil only after the pan is hot, never before. Cold oil in a cold pan heats slowly and unevenly, and it soaks into whatever you’re cooking instead of coating the metal. A hot pan flashes the oil into a thin, even layer almost instantly. Watch for shimmer, that faint rippling look across the surface. Smoke means you’ve gone too far and the oil is starting to break down.
Stick with high-smoke-point oils for searing: refined avocado oil, refined grapeseed oil, or canola oil. Butter tastes great but its milk solids scorch at lower temperatures than most cooking oils, leaving behind a sticky, burnt film rather than a clean release. A side-by-side comparison from chefs backs this up: if you want butter flavor, add it at the very end of cooking or use clarified butter (ghee), which has the milk solids removed and can handle higher heat without burning.
Pro Tip: Use about a teaspoon of oil for a 10 inch pan, swivel the pan to coat it evenly, then wipe out any excess with a paper towel. A thin film releases food better than a puddle, which just pools and cooks unevenly.
How long before food actually releases
Release timing depends entirely on what’s in the pan.
- Eggs: These are the most sensitive. Give them 60 to 90 seconds on medium before attempting to move them at all.
- Thin fish fillets: Look for the edges to turn opaque and the fillet to move freely when you nudge the pan, usually 2 to 3 minutes per side.
- Steaks and thicker cuts: These can take 3 to 5 minutes for a proper sear to develop before the crust releases cleanly.
Resist the urge to test with a spatula every 20 seconds. Each poke disturbs the crust that’s forming and can tear food loose before it’s actually ready to let go on its own.
Matching pan size to your burner
A pan that’s too small for a large burner concentrates heat in the center and leaves the edges cool, which creates exactly the uneven expansion that causes sticking. On electric coil ranges, give the pan slightly longer to preheat since coils cycle on and off. Smooth glass tops distribute heat more evenly but can scorch food faster once they hit temperature. Gas ranges give you the most direct control over that critical preheat window. Whatever burner type you use, check that your pan sits flat against it. A warped bottom rocks slightly and creates its own hot spots no amount of technique will fix.
Why Stainless Steel Makes Food Stick in the First Place
Sticking isn’t bad luck. It’s chemistry. Under a microscope, even a polished stainless steel surface is covered in tiny valleys and ridges. When proteins in meat, fish, or eggs touch hot metal, they coagulate and form molecular bonds directly with those microscopic irregularities, according to an explanation of the mechanism from Chef Paulo. The food isn’t just resting on the pan, it’s chemically welding itself to it at a microscopic level.
Cold, wet food makes this worse. A cold steak dropped into hot oil drags the oil’s temperature down instantly, right at the exact spot where the meat touches metal. That temperature drop gives proteins more time to bond before a proper sear locks them out. Surface moisture on food does something similar, it turns to steam on contact and can splash oil around unevenly, leaving bare patches of hot metal exposed. That’s why patting food dry and letting it approach room temperature for 10 to 15 minutes before cooking matters as much as any technique with the pan itself.
Preheating and oil work together to solve this. A properly heated pan crossing the Leidenfrost threshold near 379°F creates a thin vapor layer that keeps moisture from directly contacting the metal. Oil does the rest by physically filling those microscopic valleys, smoothing the surface just enough that proteins have nothing to grab onto. Shimmering oil is your practical, visual stand-in for hitting that target temperature without needing a thermometer.
Why Is My Food Still Sticking? Quick Fixes for Common Problems
Even with the right routine, sticking still happens sometimes. Here’s how to diagnose it fast, right at the stove.
- Food sticks the moment it hits the pan: the pan wasn’t hot enough. Pull the food out, wipe the pan, reheat it empty, and rerun the water-drop test before trying again.
- Oil is smoking or food is turning black: your oil’s smoke point is too low for the heat you’re using, or the heat itself is too high. Swap to a higher smoke-point oil like refined avocado oil and drop the burner by one setting.
- Sticking happens in one spot but not others: that’s usually a hot spot from an uneven burner, a warped pan bottom, or cookware that’s too thin to distribute heat evenly. A quick flatness check (set the pan on a flat counter and see if it rocks) tells you fast whether the pan itself is the problem.
- Everything sticks when the pan is full: you’re crowding it. Cooking three chicken breasts in a pan built for two drops the surface temperature and traps steam against the food. Cook in batches and let the pan reheat for 30 to 60 seconds between rounds.
- Food seems stuck but hasn’t burned: don’t force it. Lower the heat slightly and wait another 30 to 60 seconds. Natural release almost always happens once a proper crust forms, forcing it early just tears the crust and leaves half of it behind in the pan.
How to Clean Stuck-On and Burnt Stainless Steel Pans
If food has already welded itself to the pan, don’t reach for steel wool first. Start gentler and escalate only if you need to.
- Simmer hot water with a squirt of dish soap directly in the pan for a few minutes, then scrape gently with a wooden spoon to loosen the fond.
- If that doesn’t clear it, use the baking soda and foil method. Sprinkle a generous layer of baking soda over the burnt area, add a splash of water to form a paste, then scrub with a crumpled piece of aluminum foil. In side-by-side testing across five cleaning methods, this combination came out as the fastest and most effective for stubborn burnt eggs and scorched residue.
- For heavier buildup, boil it out. Combine 1 cup of white vinegar with water in the pan, bring it to a boil, then remove from heat and stir in a few tablespoons of baking soda. The reaction helps lift carbonized residue that soap alone won’t touch.
- Lemon works as a milder alternative. Boil a halved lemon in water for 10 minutes; the acidity helps loosen lighter stains without any scrubbing at all.
- For scattered tough spots, try a dishwasher tablet. Wet the tablet slightly and rub it directly on the stain, it’s abrasive enough to lift residue without scratching the finish.
Avoid steel wool on polished stainless, it leaves fine scratches that actually give future food more places to grab onto. Skip aggressive oven cleaners too; they’re formulated for enamel and can pit stainless finishes. Rainbow-colored discoloration from overheating is cosmetic, not damage, and usually buffs out with a little Bar Keepers Friend.
Kitchen Devotion’s Take on Getting Stainless Steel Right
Kitchen Devotion’s cookware coverage, including our breakdowns of stainless steel cookware options and carbon steel seasoning, keeps circling back to the same manufacturer-backed routine: preheat properly, run the water test, add fat to a hot pan, and use oils built for the heat you’re actually cooking at. It’s not a trick, it’s just physics applied consistently.
Before you blame technique, check the pan itself. Set it on a flat counter and look for rocking, that’s a warped bottom working against you no matter how well you preheat. Check the gauge too. Thin, single-layer stainless heats unevenly and develops hot spots fast, while multi-ply construction with an aluminum or copper core distributes heat far more consistently across the cooking surface. A CNET breakdown of building release on stainless confirms that repeated correct heating and oiling can build a more release-friendly patina over time, though it will never behave like a permanent nonstick coating.
Does Pan Quality Actually Matter for Sticking?
Yes, and it’s often the piece home cooks overlook while they’re troubleshooting technique. Thin, single-ply stainless steel heats fast but unevenly, which means you’re fighting hot spots no matter how carefully you preheat. Multi-ply or tri-ply construction, where an aluminum or copper core sits sandwiched between layers of stainless, spreads heat far more evenly across the base and up the sidewalls.
Surface finish matters too. A mirror-polished interior looks impressive on a shelf, but a slightly less glossy, more matte finish can actually perform better for release since it’s often manufactured with more uniform micro-texture rather than random scratches from over-polishing. Weight is a rough but useful proxy here. Heavier pans in a given size usually mean thicker gauge steel and better heat retention, which translates directly into fewer sticking surprises mid-cook.
Flatness is the detail most people skip when shopping. Set a candidate pan on a flat countertop before you buy it if you can, or check it as soon as it arrives. Even a slight warp, often from a manufacturing defect or a single trip through extreme heat, creates uneven contact with your burner and guarantees hot spots. If you’re shopping for an upgrade, Kitchen Devotion’s guide to stainless steel cookware options walks through gauge, ply construction, and finish side by side so you’re not guessing at the store.
Can You Season a Stainless Steel Pan?
Not the way you’d season cast iron or carbon steel, but you can build a more forgiving surface over time. True seasoning relies on oil polymerizing into a hardened layer at high heat, something carbon steel does well because of its porous surface. Stainless steel is far less porous, so it won’t hold a baked-on patina the same way.
That said, repeated correct use does something real. Every time you heat the pan properly and coat it with oil before cooking, you’re temporarily filling those microscopic surface valleys and reinforcing good habits that make the next cook easier. Some cooks run a light “pre-treatment” pass on a brand-new pan: heat it dry for a few minutes, coat it with a thin layer of oil, let it heat until shimmering, then wipe it out and repeat two or three times before the pan ever touches real food. This isn’t a substitute for the preheat and water-test routine before every single cook, but it does help knock the sharp edges off a pan straight out of the box. Think of it as breaking the pan in, not seasoning it permanently.
Which Utensils Protect Your Pan’s Release Ability?
Metal utensils won’t ruin stainless steel the way they’d scratch a nonstick coating, but they can still work against you. Sharp-edged metal spatulas can gouge the surface over years of use, and those gouges become new microscopic valleys where food catches. A silicone or wood spatula with a slightly flexible edge slides under a forming crust more cleanly than a rigid metal one, which matters most in that critical release window.
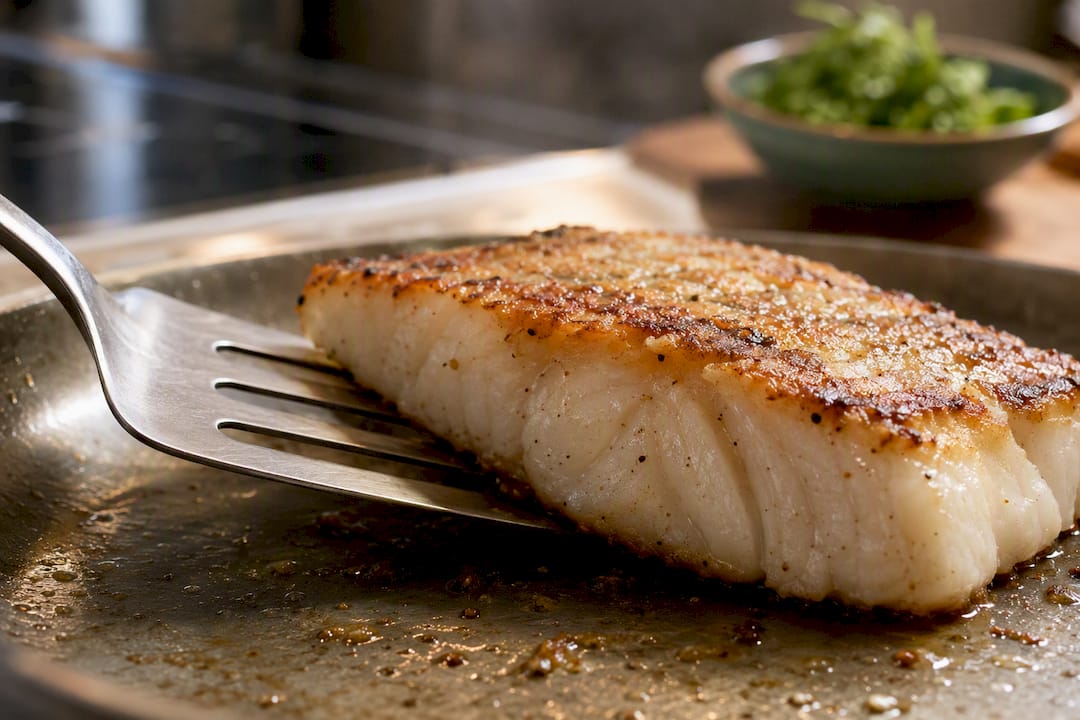
Fish spatulas, thin and slightly flexible with a beveled edge, are worth owning if you cook fish or eggs often. They’re built specifically to slide under delicate food without tearing the crust that’s forming, which is exactly the moment sticking usually turns into a mess. For searing steaks or browning larger cuts, tongs give you more control than a spatula since you’re lifting rather than scraping.
Whatever you use, avoid stacking pans directly on top of each other in a cabinet without protection, since metal-on-metal contact during storage can scratch the cooking surface before you’ve even used the pan. A pan protector or a folded towel between stacked cookware costs nothing and keeps that surface smoother longer.
What Mistakes Cause Most of the Sticking You’re Fighting?
Nearly every sticking complaint traces back to one of a handful of repeat offenders, and fixing them costs no extra time once you know what to look for.
- Adding oil to a cold pan. Oil heats unevenly and soaks into food instead of coating the metal.
- Skipping the water-drop test entirely. Guessing at temperature by eye leads to inconsistent results every single time.
- Cooking food straight from the fridge. Cold, wet food drags down the pan’s surface temperature exactly where contact matters most.
- Flipping or moving food too early. This tears apart a crust that hasn’t finished forming and leaves half of it behind.
- Crowding the pan. Too much food at once traps steam and drops the surface temperature across the whole pan.
- Using the wrong oil for the heat level. Butter or extra-virgin olive oil at high searing temperatures burns and creates sticky residue rather than a clean release.
When Should You Reach for Stainless Steel, and When Should You Grab Something Else?
Stainless steel earns its keep on searing, building pan sauces, and cooking anything acidic that would eat away at a nonstick coating over time, tomato sauces and wine reductions included. It’s the pan you want when you’re chasing a deep, browned crust on a steak or scraping up fond for a sauce.
It’s not the right tool for everything, though. Delicate eggs, crepes, and anything cooked with very little fat still do better in a well-seasoned cast iron pan or a quality nonstick, where the margin for error is wider and cleanup is faster. The most practical setup for most home cooks isn’t picking one pan forever, it’s keeping a stainless skillet and a dependable everyday nonstick in rotation, and reaching for whichever one actually fits what’s in front of you tonight.
— K. Connors
Ready to Upgrade Your Cookware Lineup?
If your current pan is warped, thin, or just fighting you no matter how well you preheat it, technique alone won’t fix a bad pan. Kitchen Devotion’s cookware sets collection is built around exactly the qualities this article covers: even multi-ply construction, flat bases, and finishes that actually help food release instead of grab.

Not sure what to look for beyond the basics? Our guide on how to choose the right cookware materials breaks down gauge, ply construction, and finish so you can shop with a checklist instead of a guess. If storage is part of your problem too, our piece on storing cookware without damaging it covers how stacking and scratching quietly undo good technique over time. Start with the cookware sets page, compare a couple of options against what’s currently in your cabinet, and see what actually changes at the stove.
Sources
- Chowhound: stainless steel water test tip
- Chef Paulo: why food sticks to stainless-steel
- Kitchn: I tested 5 methods for cleaning a burnt stainless steel pan
- CNET: Yes, you can build a nonstick coating on stainless-steel
FAQ
How Do You Stop Stainless Steel Pans From Sticking?
Preheat the empty pan 2 to 3 minutes on medium, confirm readiness with the water-drop test, add a thin film of high-smoke-point oil, pat food dry, and wait for natural release before moving it.
Why Does Food Always Stick to My Stainless Steel Pan?
Food usually sticks because the pan wasn’t hot enough before oil went in, or the food was cold and wet when it hit the surface. Proteins bond directly to microscopic metal irregularities when there’s no proper vapor and oil barrier in place, according to Chef Paulo’s explanation of the mechanism.
How Do I Make My Stainless Steel Pan Nonstick Again?
You can’t restore a permanent nonstick coating, but consistent, correct heating and oiling builds a more release-friendly surface over time. If the surface is scratched from steel wool or aggressive scrubbing, no amount of technique will fully fix it, and it may be time to consider a replacement pan.
Why Is Meat Sticking to My Stainless Steel Pan?
Cold meat straight from the fridge drops the pan’s surface temperature right where contact happens, giving proteins more time to bond before a sear forms. Let meat rest 10 to 15 minutes at room temperature and pat it fully dry before it touches the pan.
Can Stainless Steel Ever Be as Nonstick as a Coated Pan?
No, and it’s not designed to be. Stainless steel relies on technique, heat, and oil for release, while coated nonstick pans use a chemical barrier that works even at lower temperatures with less fat.




No comment