Crispy air fryer cooking is defined as the process of using rapid hot air circulation to dehydrate food surfaces and trigger the Maillard reaction, producing a crunchy, golden crust without deep frying. To master air fryer crispy techniques, you need to control four variables: moisture, temperature, spacing, and timing. Get all four right and you get results that rival a deep fryer at a fraction of the oil. Miss even one and you get soggy, pale, disappointing food. This guide covers the science, the prep steps, the cooking methods, and the advanced tricks that separate consistently crispy results from guesswork.
What causes crispiness in air fryer cooking?
Crispiness in an air fryer comes from two things working together: moisture evaporation and surface browning. The fan drives superheated air across every exposed surface of your food. That moving air pulls moisture away from the surface faster than a conventional oven can. Once the surface is dry enough, the Maillard reaction kicks in and the crust forms.
The Maillard reaction is a chemical process between amino acids and sugars that creates brown color and deep flavor. It requires surface temperatures above 280°F. Air fryers reach this range quickly, which is why they brown food faster than steaming or boiling ever could.
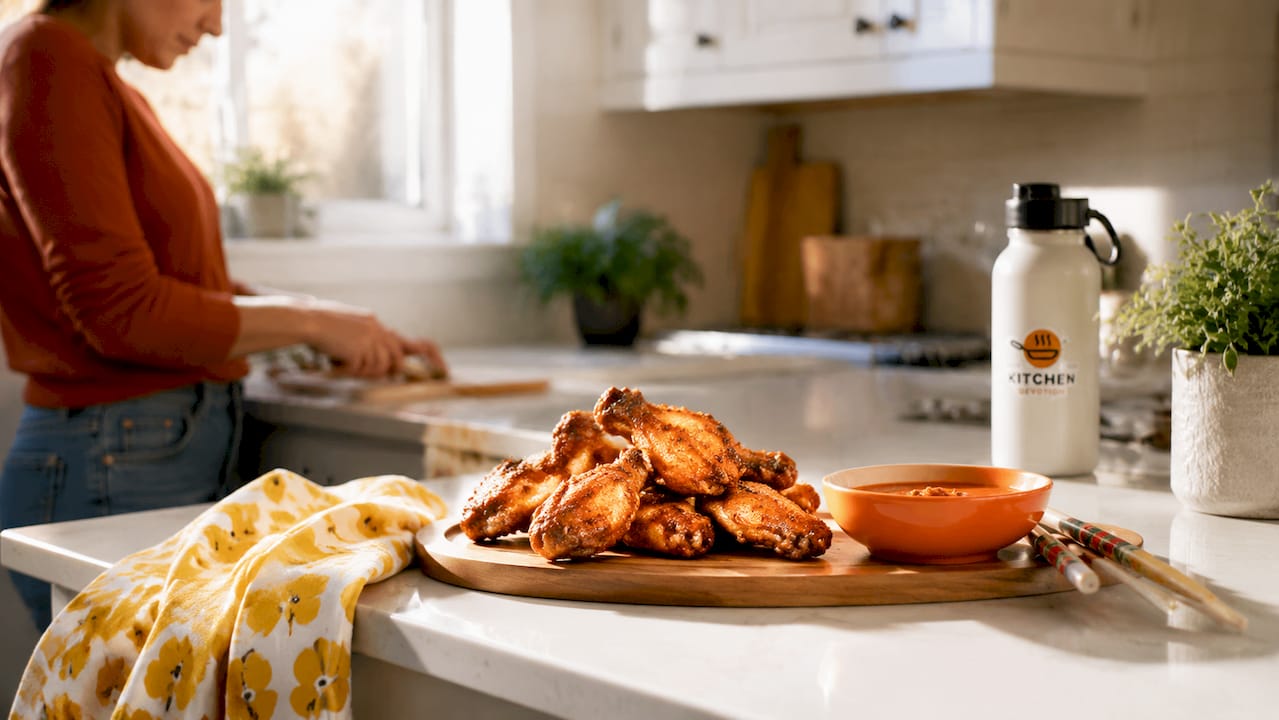
Airflow is vital to this process. The fan’s circulation needs direct contact with the food surface. That is why single-layer cooking and shaking or flipping are not optional steps. They are the mechanism that makes the whole system work.
Steam is the enemy of crispiness. When food releases moisture faster than the air can carry it away, steam builds up around the surface. That steam softens the crust before it can set. Overcrowding the basket traps steam between pieces and kills crispiness across the entire batch.
Key factors that drive crispiness:
- Hot air circulation: The fan delivers heat evenly and removes moisture continuously.
- Low surface moisture: Wet food steams instead of browning.
- Correct temperature: 400°F+ helps browning and crisping effectively. Low temperature is the most common cause of soggy results.
- Single-layer spacing: Direct air contact with every surface is non-negotiable.
- Thin oil coat: Oil conducts heat at the surface and promotes browning. Too much oil pools and causes steaming.
Pro Tip: If your air fryer has a preheat setting, use it every time. A cold basket absorbs heat from your food instead of cooking it, which delays browning and extends the window where steam can soften the surface.
Essential preparation steps for crispy air fryer results
Preparation is where most home cooks lose the crispiness battle before the cooking even starts. The food that goes into the basket determines the result more than any setting on the machine.
Follow these steps before every cook:
-
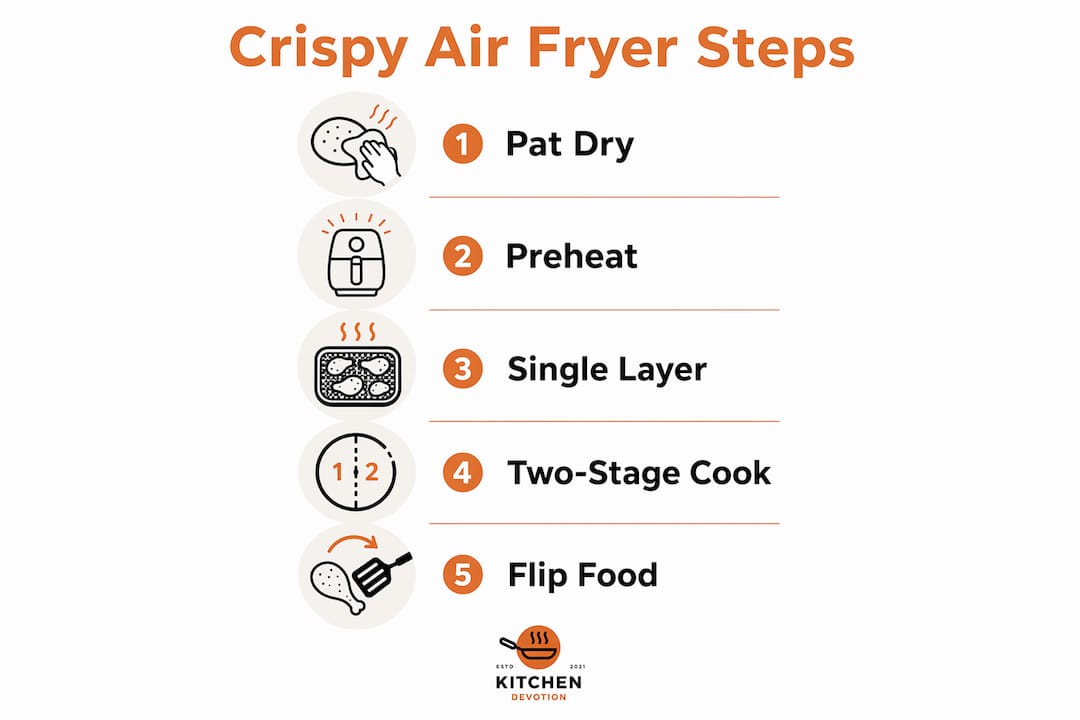
Pat food completely dry. Use paper towels to remove surface moisture from proteins, vegetables, and anything with a wet marinade. Patting food dry is non-negotiable for crispiness. Surface moisture creates steam that softens the crust before it can form.
-
Air-dry in the fridge when time allows. Place proteins uncovered on a rack in the refrigerator for 1–4 hours before cooking. Fridge air-drying outperforms towel-patting alone for moisture removal. The cold, dry air pulls residual moisture from the surface in a way paper towels cannot reach.
-
Apply a thin, even oil coat. Use a spray bottle or toss food lightly in a bowl. About 1–2 teaspoons per pound is effective. Spray oils are better than pouring because they distribute evenly without pooling. Excess oil does not make food crispier. It makes it greasy and can cause smoke.
-
Add a crisping agent to your coating. Cornstarch or baking powder mixed into a dry coating alters the surface chemistry and creates a noticeably crunchier crust. Baking powder raises the surface pH, which speeds up browning. Cornstarch forms a thin, rigid shell when heated. Both work well on chicken, fish, and vegetables.
-
Preheat the basket for 3–5 minutes. Preheating jump-starts browning by heating the basket and chamber surfaces before food touches them. Larger air fryer units may need longer preheat times. Check your model’s manual for the recommended duration.
Pro Tip: For chicken wings or thighs, mix one teaspoon of baking powder with half a teaspoon of salt and coat the skin 1–2 hours before cooking. This dry brine pulls moisture out of the skin and sets you up for blistered, crackly results.
Seasoning goes on after the oil coat, not before. Salt draws moisture out of food. If you salt too early, you create surface moisture that works against you. Season right before the food goes into the basket.
How to cook for even browning and crispness
Even the best-prepared food will come out soggy if you cook it wrong. These four techniques cover the most common errors and fix them directly.
-
Cook in a single layer, always. Stacking food blocks airflow between pieces. Single-layer spacing allows direct hot air to reach every food surface. If your basket is too small for a full batch, cook in two rounds. The second batch will be just as good as the first.
-
Shake or flip halfway through. Flip or shake the basket halfway through cooking for even browning. For small breaded items like nuggets or fries, shake every 5 minutes. Skipping this step leaves the bottom surface sitting in its own moisture and produces uneven texture.
-
Use the right temperature range. The sweet spot for most foods is 375–400°F. Below 375°F, food dries out slowly without browning well. Above 400°F, the exterior can darken before the interior cooks through. Adjust based on thickness: thin items like shrimp or sliced zucchini cook at 375°F, while chicken thighs and thick-cut fries do better at 400°F.
-
Use a two-stage cook for maximum crunch. Cook food at a moderate temperature until done through, then flash finish at higher heat for 2–3 minutes. This technique controls crispness while preventing the interior from overcooking. It works especially well for chicken pieces, pork belly, and thick vegetables.
| Food | Main cook temp | Flash finish temp | Total time |
|---|---|---|---|
| Chicken thighs | 375°F | 400°F | 22–25 min |
| Thick-cut fries | 380°F | 400°F | 20–22 min |
| Broccoli florets | 370°F | 390°F | 12–14 min |
| Breaded fish fillets | 375°F | 400°F | 14–16 min |
The two-stage method is the single biggest upgrade most home cooks can make to their air fryer routine. It adds only 2–3 minutes but produces a noticeably better crust.
Troubleshooting common air fryer crispiness problems
Crispiness failures usually stem from repeatable causes like moisture, crowding, temperature, coatings, and skipped flipping. Each one has a direct fix.
-
Food is soggy after cooking. The surface was too wet going in, or the basket was overcrowded. Pat food drier next time and cook in smaller batches. For proteins, try the fridge air-dry method the night before.
-
Coating falls off during cooking. The binder is missing or the food was too wet. Use an egg wash or a light cornstarch slurry before the dry coating. Press the coating firmly onto the surface before it goes into the basket.
-
Food browns on top but stays pale underneath. The basket is too full, or you skipped the flip. Shake or flip halfway through. If the problem persists, reduce the batch size so air can circulate underneath each piece.
-
Food is dark outside but raw inside. The temperature is too high for the thickness of the food. Drop to 375°F and extend the cook time. Use a meat thermometer to confirm doneness on proteins.
-
Fries come out limp. Starch on the surface is holding moisture. Soak cut potatoes in cold water for at least 30 minutes, then dry completely before cooking. This removes excess surface starch and gives the oil something solid to cling to.
Pro Tip: If you are reheating fried food in the air fryer, run it at 375°F for 3–4 minutes instead of using the microwave. The air fryer restores crunch that the microwave destroys. This works well for leftover fries, fried chicken, and spring rolls.
The most common mistake is trying to fix a soggy result by raising the temperature. Higher heat on wet food just creates more steam faster. Fix the moisture problem first, then adjust temperature.
Advanced tips for expert-level crispiness
Once you have the basics locked in, these techniques push results to a level most recipes do not cover.
Dry brining proteins
Dry brining chicken skin with salt and baking powder for 1–2 hours draws out moisture and creates blistered, crackly skin. The salt pulls liquid to the surface, where it evaporates. The baking powder raises the pH of the skin, which speeds up browning dramatically. Use one teaspoon of baking powder per pound of chicken and apply it directly to the skin.
Coating upgrades
Rice flour produces a lighter, crispier crust than all-purpose flour because it contains less protein and absorbs less oil. Panko breadcrumbs create more surface area than regular breadcrumbs, which means more contact with hot air and more crunch. Combining cornstarch with panko gives you a coating that stays crispy even after the food cools slightly.
Potato preparation for fries
Soaking potatoes for about 1 hour removes surface starch, which is the main reason fries go limp. For an extra step, parboil the cut fries in lightly salted water for 4–5 minutes before air frying. This roughens the surface and creates more texture for the oil to grip. Dry completely after parboiling before adding oil.
Oil selection and quantity
| Oil type | Smoke point | Best use |
|---|---|---|
| Avocado oil | 520°F | High-heat proteins, fries |
| Light olive oil | 465°F | Vegetables, fish |
| Coconut oil | 350°F | Lower-temp baking |
| Canola oil | 400°F | General purpose |
Avocado oil is the best all-around choice for air frying at 400°F. It has a high smoke point and a neutral flavor that does not compete with seasonings. Coconut oil smokes at air fryer temperatures and leaves a residue that affects flavor and basket cleanliness.
- Spray, do not pour. A spray bottle gives you an even coat in seconds. Pouring oil creates puddles that steam instead of crisp.
- Re-spray after flipping. The top surface that is now facing down has dried out. A light re-spray before the second half of cooking keeps browning even on both sides.
- Less is more. Excess oil pools and causes steaming or smoke. A thin coat conducts heat efficiently. A thick coat blocks it.
For readers just getting started with an air fryer, Kitchendevotion’s guide to beginner-friendly air fryers covers models with basket designs that support good airflow, which matters more than most buyers realize.
Key Takeaways
Mastering air fryer crispiness requires controlling moisture, temperature, spacing, and timing together. No single step works in isolation.
| Point | Details |
|---|---|
| Moisture is the first problem to solve | Pat food dry and use fridge air-drying for proteins before cooking. |
| Preheat every time | A 3–5 minute preheat jump-starts browning and prevents steam buildup on cold surfaces. |
| Single layer is non-negotiable | Overcrowding traps steam and kills crispiness across the entire batch. |
| Two-stage cooking adds real crunch | A 2–3 minute high-heat flash finish after the main cook produces a noticeably better crust. |
| Coatings matter | Cornstarch, baking powder, and rice flour each create crispier results than all-purpose flour alone. |
What I have learned from years of air fryer cooking
By K. Connors
The advice I see repeated most often is “just preheat and don’t overcrowd.” That is true, but it misses the deeper point. The real skill in air fryer cooking is understanding that crispiness is a moisture management problem first and a heat problem second. Most people reach for a higher temperature when food comes out soft. That rarely fixes it. The food was wet going in, and more heat just creates faster steam.
The preparation steps feel tedious the first few times. Patting food dry, letting it sit uncovered in the fridge, applying oil with a spray bottle instead of a pour. None of it is hard. But it takes patience that convenience-focused cooking culture does not encourage. The air fryer is marketed as a fast appliance, and it is. But the best results come from cooks who slow down the prep to speed up the outcome.
Batch cooking is the other thing I had to accept. Cooking in two rounds instead of one feels inefficient. The first time you do it and compare the results side by side, you will never go back to cramming a full pound of fries into a single layer. The second batch takes 15 minutes. The difference in texture is not subtle.
The two-stage flash finish changed how I think about air fryer cooking entirely. It is not a trick. It is a technique borrowed from professional kitchens where chefs finish proteins under a broiler after cooking through. The air fryer does the same thing in a smaller space. Try it once on chicken thighs and you will use it on everything.
Experiment within the framework. Change one variable at a time. If you switch from all-purpose flour to rice flour in your coating, keep everything else the same so you can actually measure the difference. That is how you build real skill instead of just following recipes.
— K. Connors
Air fryers and tools worth knowing at Kitchendevotion
Kitchendevotion curates air fryers and kitchen appliances specifically for home cooks who want real results without complicated setups.

The air fryer collection at Kitchendevotion features models selected for basket design, airflow performance, and ease of use. If you cook for a family or batch cook on weekends, the batch cooking appliances guide covers which appliances pair well with an air fryer to cut total kitchen time. For cooks watching their budget, the best air fryers under $100 list highlights affordable models that still deliver the airflow and temperature control you need for consistently crispy food.
FAQ
What is the best temperature for crispy air fryer food?
The best range is 375–400°F. Temperatures below 375°F slow moisture evaporation and prevent proper browning.
Why does my air fryer food come out soggy?
Soggy results almost always trace back to surface moisture, overcrowding, or a skipped flip. Pat food dry, cook in a single layer, and shake or flip halfway through.
Does preheating an air fryer really make a difference?
Yes. Preheating for 3–5 minutes heats the basket surface so browning starts the moment food makes contact. A cold basket delays browning and extends the time steam can soften the surface.
What coating makes air fryer food the crispiest?
Cornstarch, baking powder, or rice flour each outperform all-purpose flour for crunch. Combining cornstarch with panko breadcrumbs produces the crispiest coating for proteins and vegetables.
How do I keep air fryer food crispy after cooking?
Place cooked food on a wire rack instead of a plate. A plate traps steam underneath and softens the crust within minutes. Serve immediately when possible for the best texture.




No comment